16. How to manage background image in Seokart Lite?
1. How to install Seokart Lite?
Go to the menu Appearance > Themes and click on the Add New button.
Click on the Upload Theme button.
Click on the Browse button and navigate to the unzipped theme package on your computer.
Look for a file called Seokart.zip Click on it to select, then click OK.
Click on the Install Now button and wait until the installation is complete.
Click on the Activate link to activate the theme on your WordPress site.
2. Install & Activate Burger Companion Plugin?
In the WordPress dashboard go to the appearance submenu and click on customize. After clicking on customizing you will in theme customizer. Here you have to show in the recommended plugin then click on the install & activate Button.
3. How to Setup Home Page?
Go to Pages > Add New > Create a Page Named Home ( the name could be anything you like). On the Right Side Under the Template, the drop-down Menu is for Choosing the Home Page.
You have to Choose the Template and publish it.
2. How to Assign Home Page as a FrontPage?
From your dashboard, go to the Setting > Reading > Home Page Displays
Click on the radio button of your A Static page
Click on Save Changes.
4. How to manage header section in Seokart Lite?
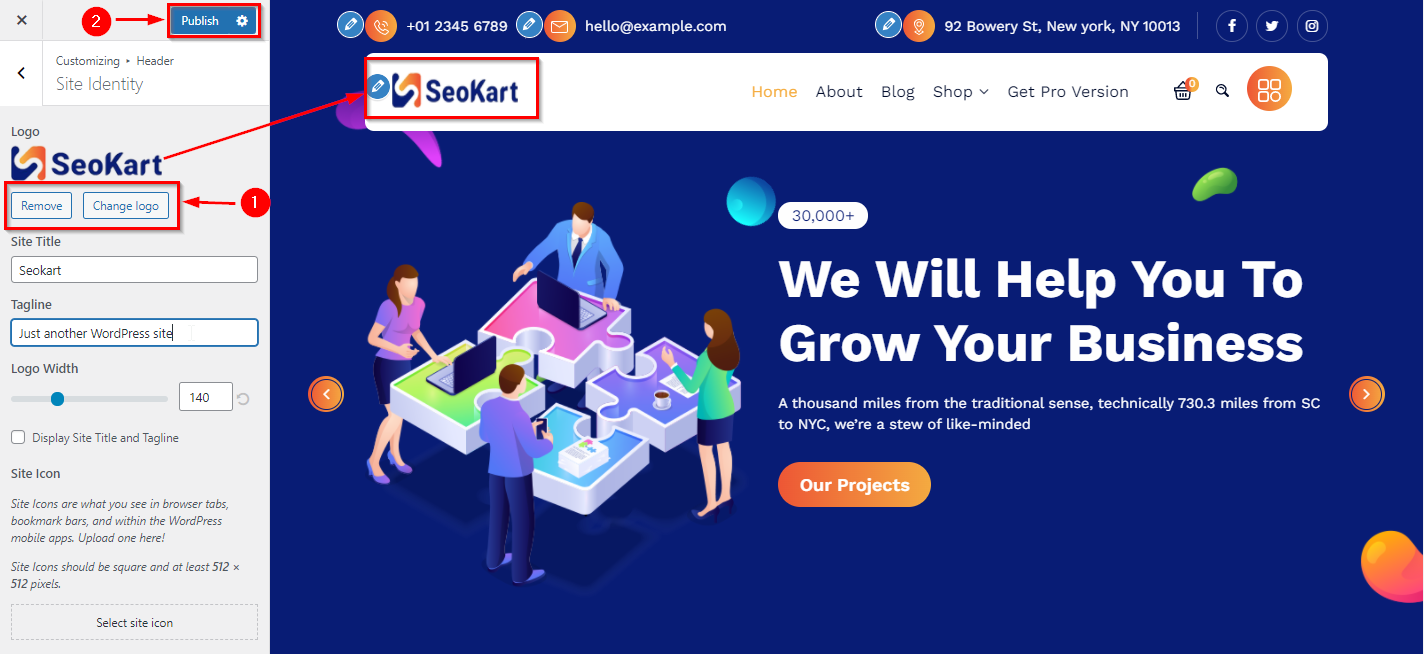
1. How to change the Site logo
From your dashboard, go to the Appearance > Customize > Header > Site Identity Section
Now Click on the select logo and choose a logo for your site.
If you change & remove the logo then you can use the buttons below it.
Click on Publish.
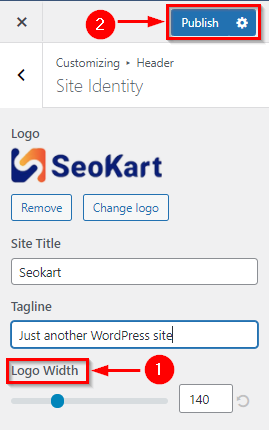
2. How to customize the width of the Site logo
From your dashboard, go to the Appearance > Customize > Header > Site Identity Section
Now Scroll bar used for logo width Customize.
Click on Publish.
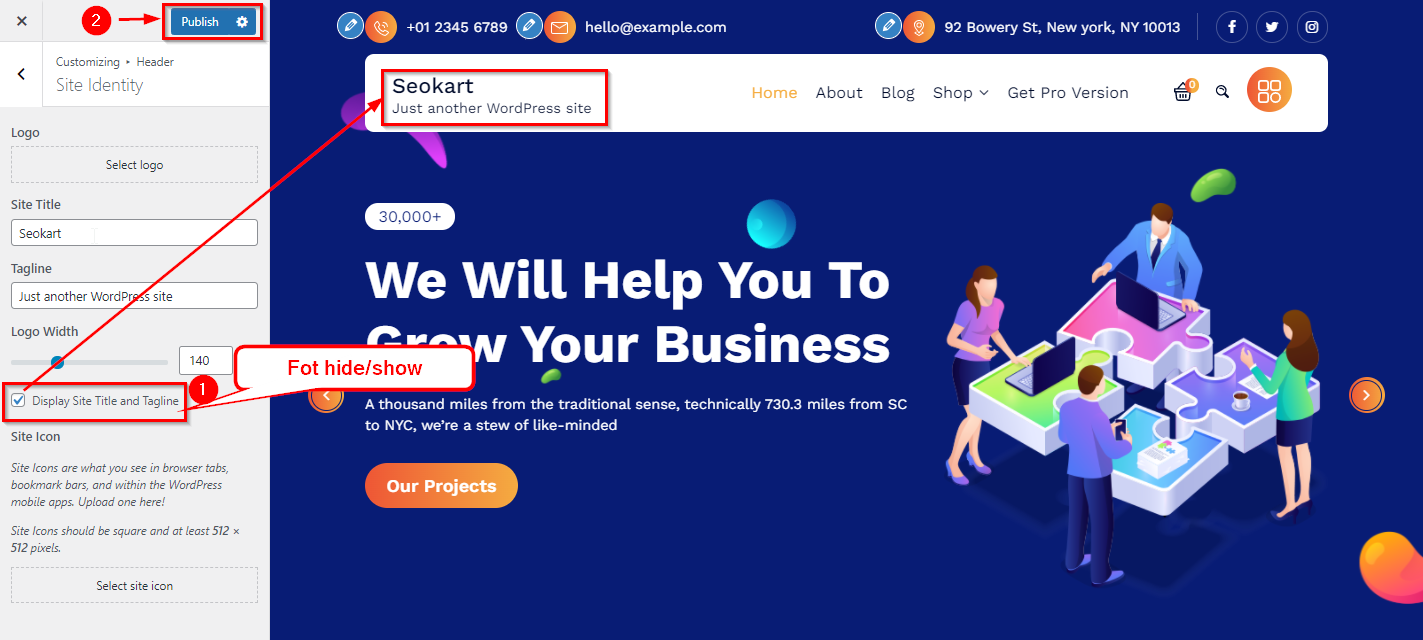
3. How to manage site title & tagline
From your dashboard, go to the Appearance > Customize > Header > Site Identity Section
Now manage site title & tagline as per your choice.
Click on Publish.
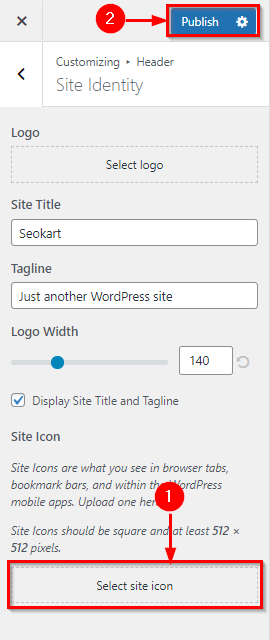
4. How to change the site icon
From your dashboard, go to the Appearance > Customize > Header > Site Identity Section
Now Click on button & select Site icon . ;
You can use site icon size maximum 512 x 512px.
Click on Publish.
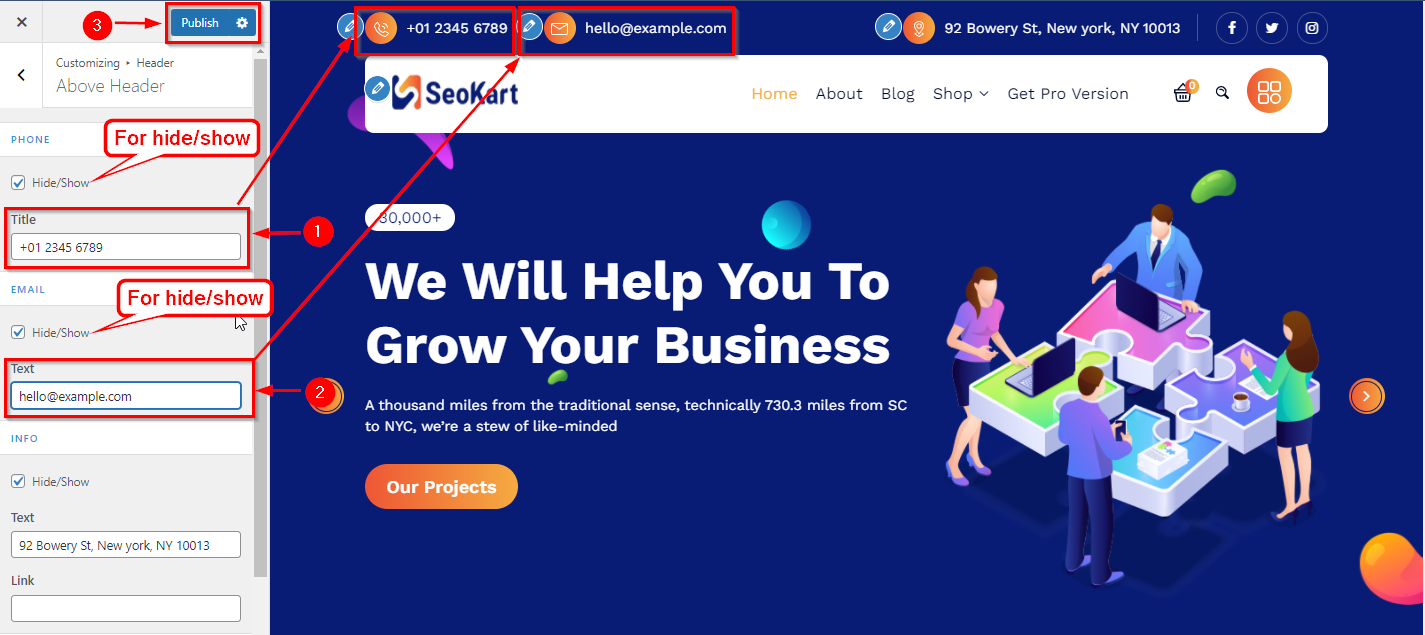
5. How to manage phone & email in the above header
From your dashboard, go to the Appearance > Customize > Header > Above header Section
Here you can manage phone & email.
Click on Publish.
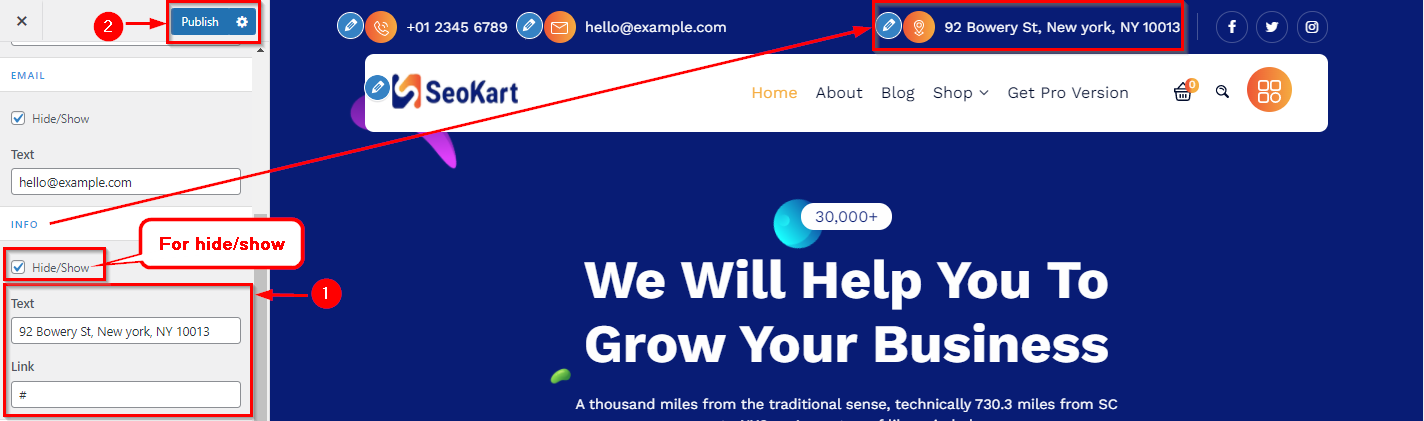
6. How to manage info in the above header
From your dashboard, go to the Appearance > Customize > Header > Above header Section
Here you can manage Info First & Second as per your choice.
Click on Publish.
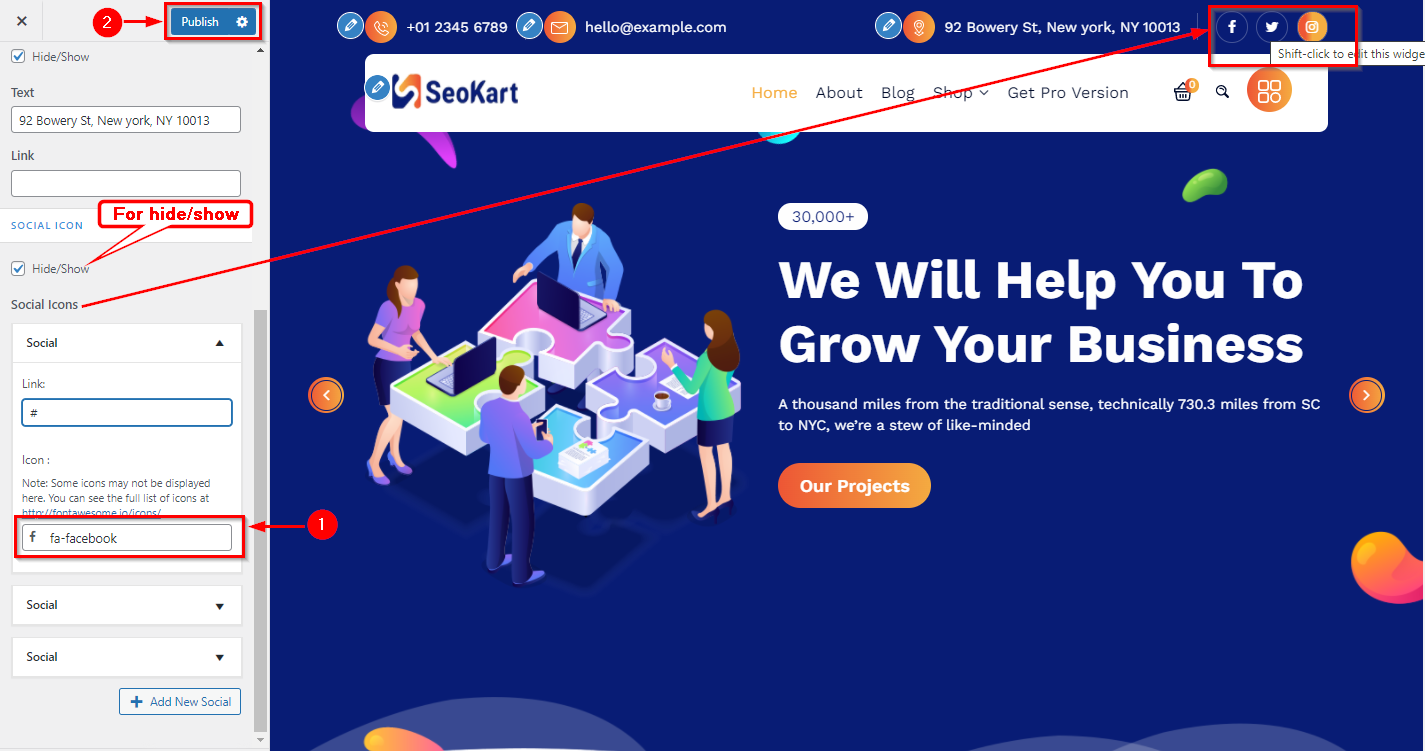
7. How to manage social icons in the above header
From your dashboard, go to the Appearance > Customize > Header > Above header Section
Here you can manage social icons as per your choice.
Click on Publish.
8. Hide/Show Cart icon in Header Navigation
From your dashboard, go to the Appearance > Customize > Header > Header Navigation Section
Now Click on the check box for Hide/Show Cart icon.
Click on Publish.
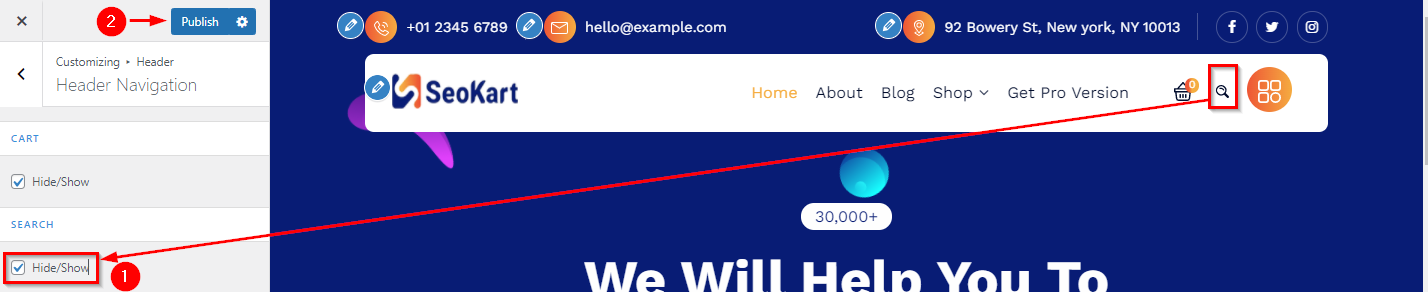
9. Hide/Show Search icon in Header Navigation
From your dashboard, go to the Appearance > Customize > Header > Header Navigation Section
Now Click on the check box for Hide/Show Search icon.
Click on Publish.
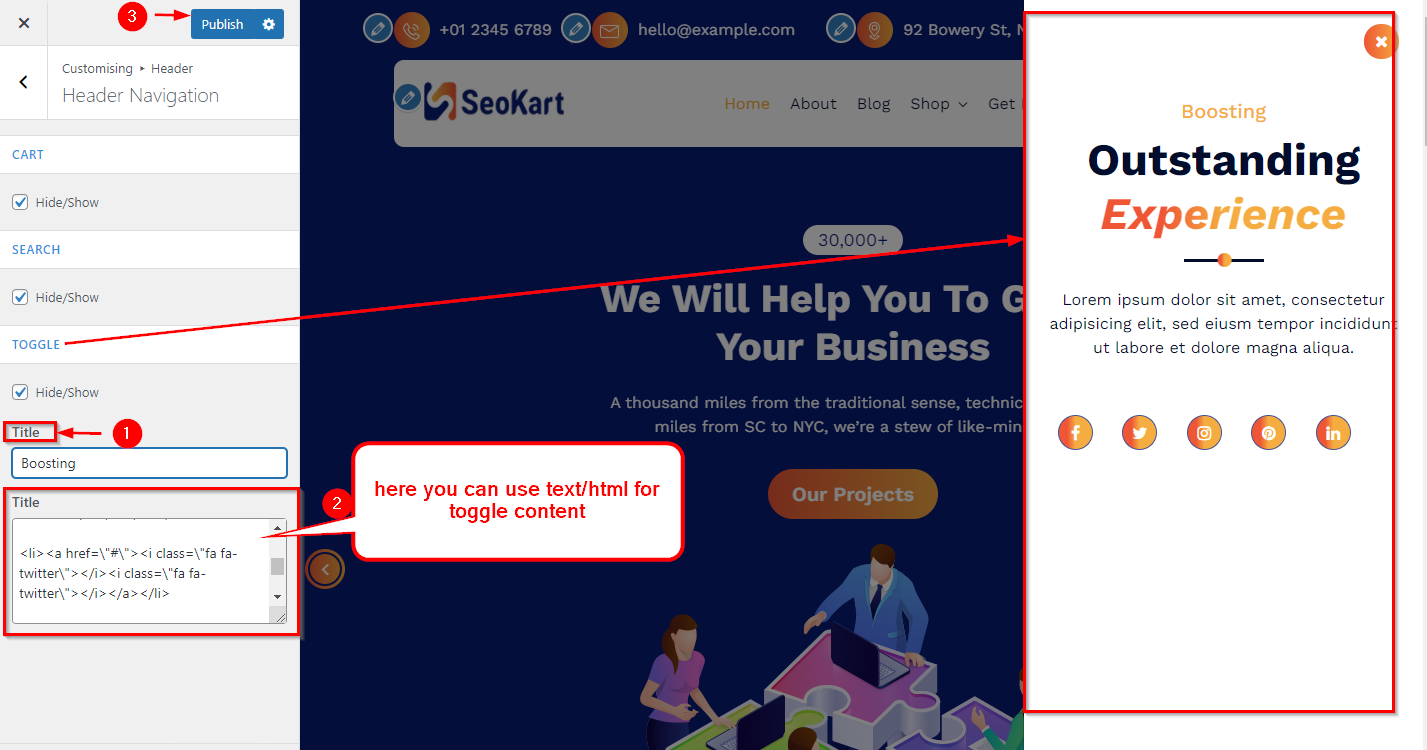
10. Manage Toggle section in Header Navigation
From your dashboard, go to the Appearance > Customize > Header > Header Navigation Section
here you can manage toggle content
Now Click on the check box for Hide/Show toggle.
Click on Publish.
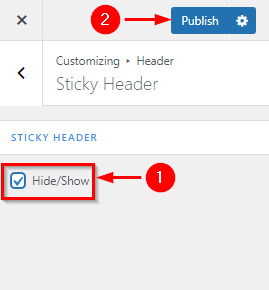
8. Hide/Show Sticky Header
From your dashboard, go to the Appearance > Customize > Header > Sticky Header Section
Now Click on the check box for Hide/Show Sticky header
Click on Publish.
5. How to manage General Section in Seokart Lite?
1. Hide/Show Breadcrumb Section
From your dashboard, go to the Appearance > Customize > General > Breadcrumb Section
Now Click on the check box for Hide/Show Breadcrumb Section.
Click on Publish.
2. How to Remove & Change Image in Breadcrumb Section
From your dashboard, go to the Appearance > Customize > General > Breadcrumb Section
Here you can Remove & Change images in Breadcrumb Section.
Click on Publish.
4. How to manage Background Attachment image
From your dashboard, go to the Appearance > Customize > General > Breadcrumb Section
Here you can set the breadcrumb image according to you.
Click on Publish.
4. Hide/Show clip art
From your dashboard, go to the Appearance > Customize > General > clip Art Section
Here you can hide/show clip Art on the theme.
Click on Publish.
6. How to manage Slider Section in Seokart?
1. How to manage Title, Subtitle & Description
From your dashboard, go to the Appearance > Customize > FrontPage Sections > Slider Section
Here you can manage the content of the slider section
Now Click on Publish
.
2. How to manage Button label in slider
From your dashboard, go to the Appearance > Customize > FrontPage Sections > Slider Section
Here you can manage button label & Link
Click on Publish.
3. How to change slider image & Alignment
From your dashboard, go to the Appearance > Customize > FrontPage Sections > Slider Section
Here you can change the slider image & set Alignment
Click on Publish
7. How to manage Feature Section?
1. How do I hide/Show Feature Section
From your dashboard, go to the Appearance > Customize > FrontPage Sections > Feature Section
Here you can Hide/Show Feature Section
Now Click on Publish.
2. How to manage Title, Subtitle & Description Feature Section
From your dashboard, go to the Appearance > Customize > FrontPage Sections > Feature Section
Here you can manage the title, Subtitle & Description Feature Section
Now Click on Publish.
3. How do I manage the content of the Feature Section
From your dashboard, go to the Appearance > Customize > FrontPage Sections > Feature Section
Here you can manage the content of the Feature Section
Now Click on Publish.
3. Manage the center image of the Feature Section
From your dashboard, go to the Appearance > Customize > FrontPage Sections > Feature Section
Here you can manage the center image of the Feature Section
Now Click on Publish.
8. How to manage team section in Seokart?
1. How do I hide/Show Team Section
From your dashboard, go to the Appearance > Customize > FrontPage Sections > Team Section
Here you can Hide/Show Team Section
Now Click on Publish.
2. How to manage Title, Subtitle & Description
From your dashboard, go to the Appearance > Customize > FrontPage Sections > Team Section
Here you can manage the title, subtitle & description of the Team section
Now Click on Publish.
3. How do I manage the content of the Team Section
From your dashboard, go to the Appearance > Customize > FrontPage Sections > Team Section
Here you can manage the content of the Team Section
Now Click on Publish.
4. Manage the Background image of the team Section
From your dashboard, go to the Appearance > Customize > FrontPage Sections > Team Section
Here you can manage the Background image of the Team Section
Now Click on Publish.
9. How to manage Blog Section in Seokart Lite?
1. How to manage title, Subtitle & Description
From your dashboard, go to the Appearance > Customize > FrontPage Sections > Blog Section
Here you can change the title, Subtitle & Description in the Blog section.
Click on Publish.
2. How to manage no of posts display in FrontPage
From your dashboard, go to the Appearance > Customize > FrontPage Sections > Blog Section
Here you can manage no of posts display on Blog in FrontPage.
Click on Publish.
10. How to manage footer section in Seokart Lite?
1. How to manage footer background image related setting in the footer
From your dashboard, go to the Appearance > Customize > Footer > Footer Background
Here you can change the footer background image-related setting.
Click on Publish.
2. How to manage content in Footer Above Section
From your dashboard, go to the Appearance > Customize > Footer > Footer Above
Here you can manage content in Footer Above Section.
Click on Publish.
2. How to manage the Copyright footer bottom in the footer.
From your dashboard, go to the Appearance > Customize > Footer > Footer Background
Here you can change the Copyright Text.
Click on Publish.
11. How to manage Typography?
1. How to manage Font Size & Line height in Body Typography
From your dashboard , go to the Appearance > Customize > typography > body typography Section
Here You can manage Font Size &; line Height.
Click on Publish.
2.How to manage Font Style & Transform in Body Typography
From your dashboard , go to the Appearance > Customize > typography > body typography Section
Here You can manage Font Style & Transform.
Click on Publish.
3.How to manage Font Size & Line height H1 to H6 in Headings Typography
From your dashboard, go to the Appearance > Customize > typography > Heading Section
Here You can manage Font Size & line Height.
Click on Publish.
4. How to manage Font Style & Transform H1 to H6 in Headings Typography
From your dashboard, go to the Appearance > Customize > typography > Heading Section
Here You can manage Font Style & Transform.
Click on Publish.
12. How to manage colors in Seokart Lite?
How to manage Background Color
From your dashboard , go to the Appearance > Customize > Colors > Background Color
Here You can manage background color.
Click on Publish.
13. How to manage header image in Seokart?
1. How to the setup Header image
From your dashboard, go to the Appearance > Customize > Header image
Here You can set up a header image.
If you change & remove the logo then you can use the buttons below it.
Click on Publish.
14. How to add Additional CSS?
1. How to add Additional CSS
From your dashboard, go to the Appearance > Additional CSS >
Here you can paste your Additional CSS
Click on Publish.
15. How to manage menu setup?
From your dashboard, go to the Appearance > Menus > Select Menu
Here Select Menu according to you
Click on Save Menu.
16. How to manage background image in Seokart Lite?
In WordPress Dashboard go to the Appearance submenu and click on Customize.
After clicking on customizing you will in theme Customizer.
Here you have to click on the Home Page Section.
Here you have to click on the Background Image Section
In-background Image Here you can manage the image.
Go to Customize ->Home Page Section-> Background Image Section