How to Activate License key in CoziPress pro
Go to your WordPress website dashboard
Go to Appearance > Theme License
Enter your theme license key into the License Key field
Click Activate

Go to the menu Appearance > Themes and click on the Add New button.
Click on the Upload Theme button.
Click on the Browse button and navigate to the unzipped theme package on your computer.
Look for a file called CoziPress pro.zip Click on it to select, then click OK.
Click on the Install Now button and wait until the installation is complete.
Click on the Activate link to activate the theme on your WordPress site.
Go to your WordPress website dashboard
Go to Appearance > Theme License
Enter your theme license key into the License Key field
Click Activate
Install One Click Demo Import plugin in your site
After installing the plugin,
Go to Appearance > Premade Demos
Finally, click Import Demo Data Button
Wait for the import to finish
You are done!!!

1. Slider Section :- 1920*960 pixels
2.Info Section :- 470*330 pixels
3.Service Section :- 35*35 pixels
4.Design & Development Section :- 463*314 pixels
5.Project Section :- 542*477 pixels
6.Team Section :- 508*676 pixels
7.Gallery Section :- 850*710 pixels
8.Funfact Section :- 100*100 pixels
9.Testimonial Section :- 80*80 pixels
10.Breadcrumb Section :- 1600*333 pixels
11.Blog Section :- 1108*733 pixels
Go to Pages > Add New > Create a Page Named Home ( the name could be anything you like).
On the Right Side Under the Template, a drop-down Menu is for Choosing the Home Page.
You have to Choose the Template and publish it.

From your dashboard , go to the Setting > Reading > Home Page Displays
Click on radio button of your A Static page
Click on Save Changes.

From your dashboard , go to the Appearance > Customize > Header > Site Identity Section
Now Click on select logo and choose logo for your site .
If you are change & remove logo then you can use buttons below it.
Click on Publish.

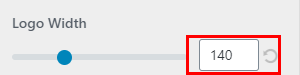
From your dashboard , go to the Appearance > Customize > Header > Site Identity Section
Now Scroll bar use for logo width Customize.
Click on Publish.
From your dashboard , go to the Appearance > Customize > Header > Site Identity Section
Now manage site title & tagline as per your choice .
Click on Publish.

From your dashboard , go to the Appearance > Customize > Header > Site Identity Section
Now Click on Check box for Hide/Show Site title & tagline.
Click on Publish.

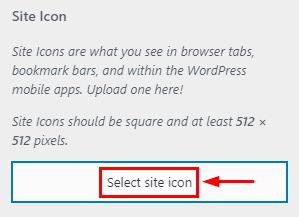
From your dashboard , go to the Appearance > Customize > Header > Site Identity Section
Now Click on button & select Site icon . ;
You can use site icon size maximum 512 x 512px.
Click on Publish.
From your dashboard , go to the Appearance > Customize > Header > Site Identity Section
Here you can customize Site title & description .
Click on Publish.
From your dashboard , go to the Appearance > Customize > Header > Header Style Section
Here you can select header type according to you .
Click on Publish.

From your dashboard, go to the Appearance > Customize > Header > Above header Section
Check Box on the Hide/Show above Header option to reveal the header top bar options.
Click on Publish.

From your dashboard, go to the Appearance > Customize > Header > Above header Section
Here you can change title & content as per your choice.
Click on Publish.

From your dashboard, go to the Appearance > Customize > Header > Above header Section
Check Box on the Hide/Show above Header option to reveal the header top bar options.
Click on Publish.

From your dashboard, go to the Appearance > Customize > Header > Above header Section
Now you can select icon in icons library & manage text in contact info section.
Click on Publish.

From your dashboard, go to the Appearance > Customize > Header > Above header Section
Check Box on the Hide/Show above Header option to reveal the header top bar options.
Click on Publish.

From your dashboard, go to the Appearance > Customize > Header > Above header Section
Now you can select icon in social icons library.
Click on Publish.

From your dashboard, go to the Appearance > Customize > Header > Above header Section
Check Box on the Hide/Show above Header option to reveal the header top bar options.
Click on Publish.

From your dashboard, go to the Appearance > Customize > Header > Above header Section
Now you can manage Button Label & Icon.
Click on Publish.

From your dashboard, go to the Appearance > Customize > Header > Header Navigation Section
Now Click on check box for Hide/Show Cart icon.
Click on Publish.

From your dashboard, go to the Appearance > Customize > Header > Header Navigation Section
Now Click on check box for Hide/Show Search icon.
Click on Publish.

From your dashboard, go to the Appearance > Customize > Header > Sticky Header Section
Now Click on check box for Hide/Show Sticky header
Click on Publish.

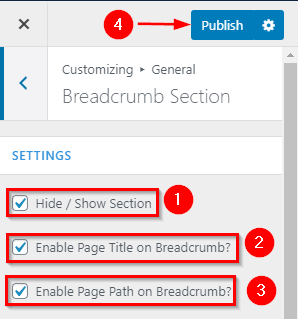
From your dashboard, go to the Appearance > Customize > General > Breadcrumb Section
Now Click on check box for Hide/Show Breadcrumb Section.
Click on Publish.
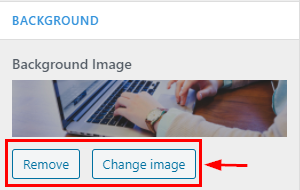
From your dashboard, go to the Appearance > Customize > General > Breadcrumb Section
Here you can Remove & Change image in Breadcrumb Section.
Click on Publish.
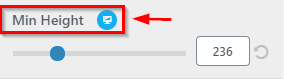
From your dashboard, go to the Appearance > Customize > General > Breadcrumb Section
Here you can manage min height in Breadcrumb Section.
Click on Publish.
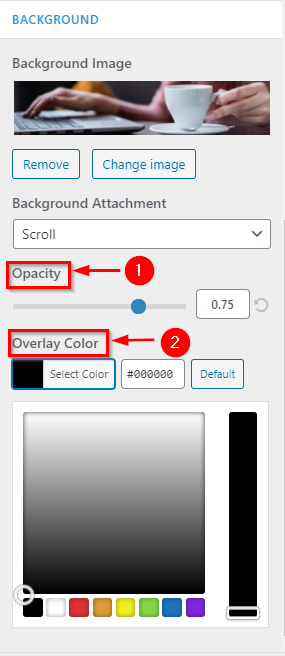
From your dashboard, go to the Appearance > Customize > General > Breadcrumb Section
Here you can set breadcrumb image according to you.
Click on Publish.

From your dashboard, go to the Appearance > Customize > General > Breadcrumb Section
Here you can manage opacity & Color Overlay
Click on Publish.
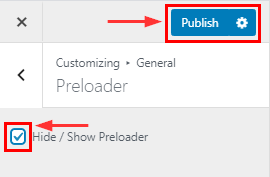
From your dashboard, go to the Appearance > Customize > General > Preloader Section
Here you can Hide/Show Preloader in Spintech Pro
Click on Publish.
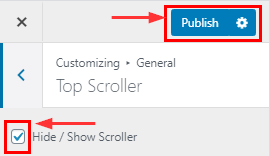
From your dashboard, go to the Appearance > Customize > General > Top Scroller Section
Here you can Hide/Show Top Scroller in Spintech Pro
Click on Publish.
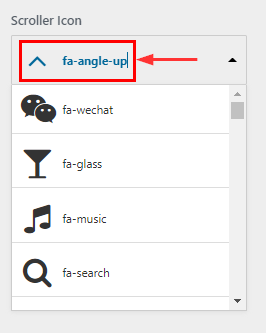
From your dashboard, go to the Appearance > Customize > General > Top Scroller Section
Here you can change Scroller icon in library
Click on Publish.
From your dashboard, go to the Appearance > Customize > FrontPage Sections > Slider Section
Here you can manage content of slider section
Now Click on Publish.

From your dashboard, go to the Appearance > Customize > FrontPage Sections > Slider Section
Here you can manage button label & Link
Click on Publish.

From your dashboard, go to the Appearance > Customize > FrontPage Sections > Slider Section
Here you can change slider image & set Alignment
Click on Publish


From your dashboard, go to the Appearance > Customize > FrontPage Sections > Slider Section
Here you can manage Animation Effects
Click on Publish

From your dashboard, go to the Appearance > Customize > FrontPage Sections > Slider Section
Here you can manage Slider Speed
Click on Publish

From your dashboard, go to the Appearance > Customize > FrontPage Sections > Info Section
Now click on check box for hide/show info section
Click on Publish.

From your dashboard, go to the Appearance > Customize > FrontPage Sections > Info Section
Here you can manage content (Like :- Title, Description, Icon, Image) in info section.
Click on Publish.


From your dashboard, go to the Appearance > Customize > FrontPage Sections > Info Section
Here you can manage info column layout
Click on Publish

From your dashboard, go to the Appearance > Customize > FrontPage Sections > Service Section
Here you can change title, Subtitle & Description in Service section.
Click on Publish.

From your dashboard, go to the Appearance > Customize > FrontPage Sections > Service Section
Here you can manage content in Service section.
Click on Publish.

From your dashboard, go to the Appearance > Customize > FrontPage Sections > Service Section
Here you can select image/icon in Service section.
Click on Publish.


From your dashboard, go to the Appearance > Customize > FrontPage Sections > Service Section
Here you can manage Column Layout in Service section.
Click on Publish.

From your dashboard, go to the Appearance > Customize > FrontPage Sections > Design & Development Section
Here you can change title, Subtitle & Description in Design & Development section.
Click on Publish.

From your dashboard, go to the Appearance > Customize > FrontPage Sections > Design & Development Section
Here you can manage content in Design & Development section.
Click on Publish.

From your dashboard, go to the Appearance > Customize > FrontPage Sections > Design & Development Section
Here you can add link on title in Design & Development section.
Click on Publish.

From your dashboard, go to the Appearance > Customize > FrontPage Sections > Design & Development Section
Here you can select image/icon in Design & Development section.
Click on Publish.


From your dashboard, go to the Appearance > Customize > FrontPage Sections > Design & Development Section
Here you can change & remove image in Design & Development section.
Click on Publish.

From your dashboard, go to the Appearance > Customize > FrontPage Sections > Pricing Section
Here you can change title, Subtitle & Description in Pricing section.
Click on Publish.

From your dashboard, go to the Appearance > Customize > FrontPage Sections > Pricing Section
Here you can display No. of pricing in Pricing section.
Click on Publish.

From your dashboard, go to the Appearance > Customize > FrontPage Sections > pricing Section
Here you can choose column layout in pricing section.
Click on Publish.

From your dashboard, go to the Pricing> Add New > Add New Price Table
Here you can create Pricing Table in Pricing section.
Click on Publish.

From your dashboard, go to the Appearance > Customize > FrontPage Sections > Project Section
Here you can change title, Subtitle & Description in project section.
Click on Publish.

From your dashboard, go to the Appearance > Customize > FrontPage Sections > project Section
Here you can choose column layout in project section.
Click on Publish.

From your dashboard, go to the Project> Add New > Add New Project
Here you can create Project Table in Project section.
Click on Publish.

From your dashboard, go to the Appearance > Customize > FrontPage Sections > Testimonial Section
Here you can change title, Subtitle & Description in Testimonial section.
Click on Publish.

From your dashboard, go to the Appearance > Customize > FrontPage Sections > Testimonial Section
Here you setup content in testimonial section.
Click on Publish.

From your dashboard, go to the Appearance > Customize > FrontPage Sections > Testimonial Section
Here you can choose column layout in testimonial section.
Click on Publish.

From your dashboard, go to the Appearance > Customize > FrontPage Sections > Testimonial Section
Here you can manage Background Image Related Settings.
Click on Publish.

From your dashboard, go to the Appearance > Customize > FrontPage Sections > Gallery Section
Here you can change title, Subtitle & Description in Gallery section.
Click on Publish.

From your dashboard, go to the Appearance > Customize > FrontPage Sections > Gallery Section
Here you setup content in gallery section.
Click on Publish.

From your dashboard, go to the Appearance > Customize > FrontPage Sections > Gallery Section
Here you can choose column layout in gallery section.
Click on Publish.

From your dashboard, go to the Appearance > Customize > FrontPage Sections > Team Section
Here you can change title, Subtitle & Description in team section.
Click on Publish.

From your dashboard, go to the Appearance > Customize > FrontPage Sections > Team Section
Here you setup content in team section.
Click on Publish.

From your dashboard, go to the Appearance > Customize > FrontPage Sections > Team Section
Here you can choose column layout in team section.
Click on Publish.

From your dashboard , go to the Appearance > Customize > Header image
Here You can setup header image.
If you are change & remove logo then you can use buttons below it.
Click on Publish.

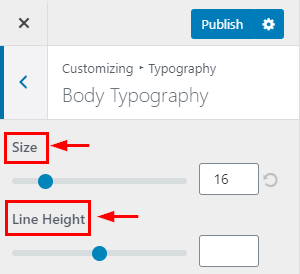
From your dashboard , go to the Appearance > Customize > typography > body typography Section
Here You can manage Font Size &; line Height.
Click on Publish.
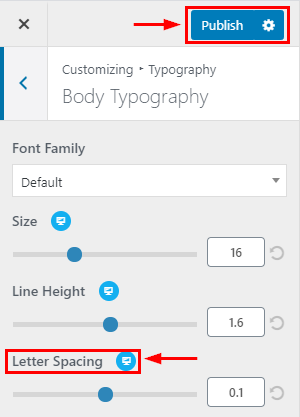
From your dashboard , go to the Appearance > Customize > typography > body typography Section
Here You can manage letter spacing.
Click on Publish.
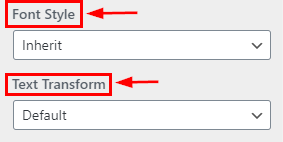
From your dashboard , go to the Appearance > Customize > typography > body typography Section
Here You can manage Font Style & Transform.
Click on Publish.
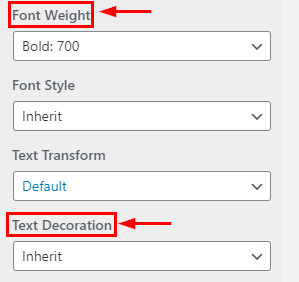
From your dashboard , go to the Appearance > Customize > typography > body typography Section
Here You can manage weight & text decoration.
Click on Publish.
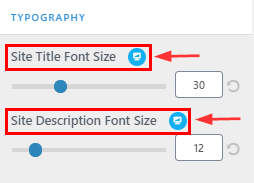
From your dashboard , go to the Appearance > Customize > typography > Heading Section
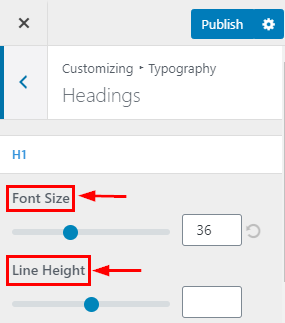
Here You can manage Font Size & line Height.
Click on Publish.
From your dashboard , go to the Appearance > Customize > typography > body typography Section
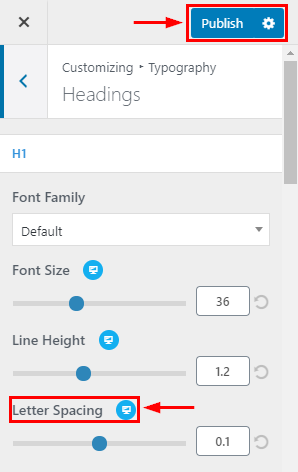
Here You can manage letter spacing.
Click on Publish.
From your dashboard , go to the Appearance > Customize > typography > Heading Section
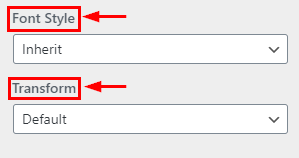
Here You can manage Font Style & Transform.
Click on Publish.
From your dashboard , go to the Appearance > Customize > typography > body typography Section
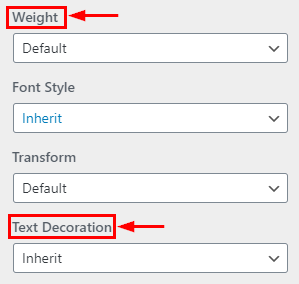
Here You can manage weight & text decoration.
Click on Publish.
From your dashboard, go to the Appearance > Customize > Style Configurator > Page Layout
Here you can manage the website layout & preset background image.
Click on Publish.

From your dashboard, go to the Appearance > Customize > Style Configurator > prebuilt theme color
Here you can manage prebuilt theme color.
Click on Publish.

From your dashboard, go to the Appearance > Customize > Style Configurator > custom color
Here you can manage custom colors.
Click on Publish.

From your dashboard, go to the Appearance > Customize > Style Configurator > custom color
Here you can manage custom primary & secondary colors.
Click on Publish.

From your dashboard, go to the Appearance > Customize > Style Configurator > Front Pallate
Here you can enable/disable front pallate.
Click on Publish.

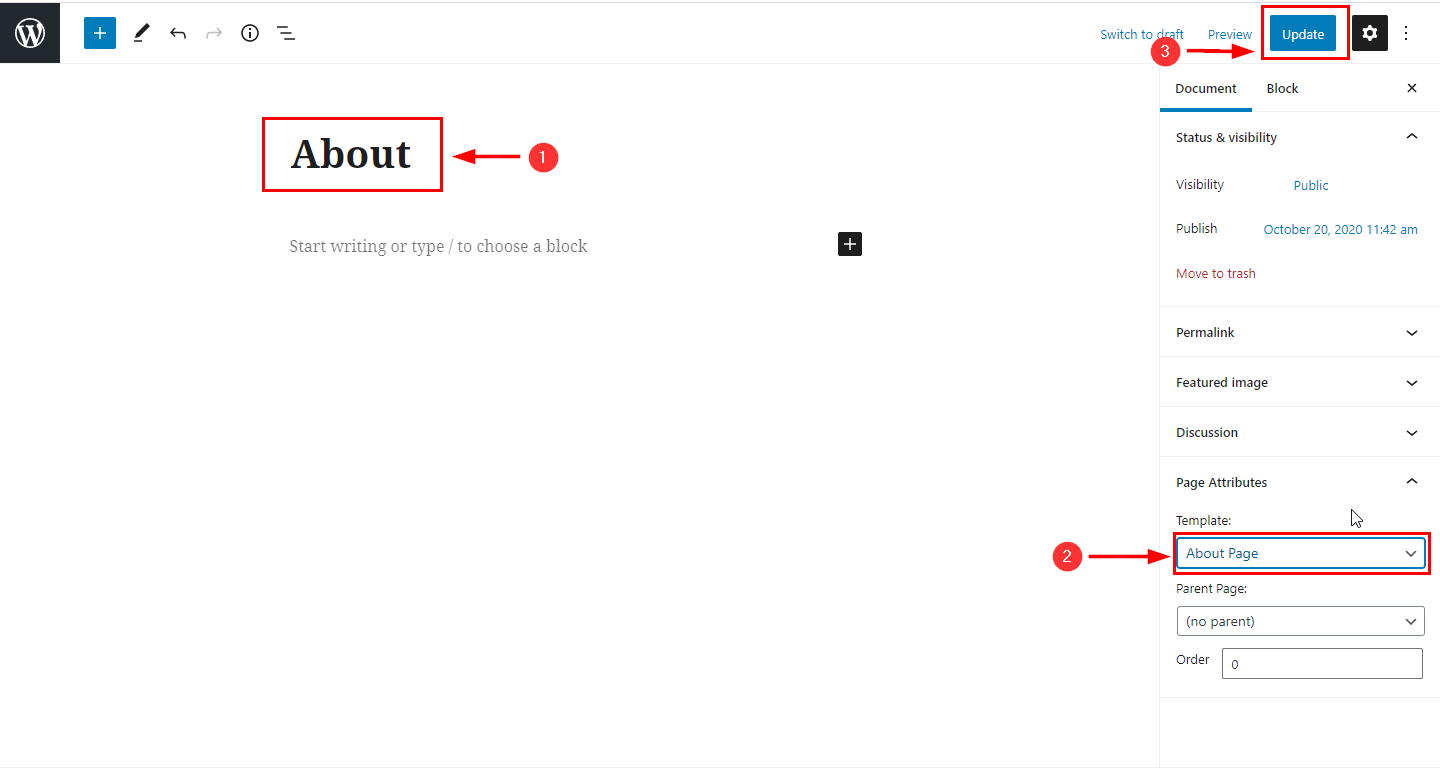
From your dashboard, go to the Dashboard > Pages > Add New
Now Create a page & Select the Template.
Click on Publish.
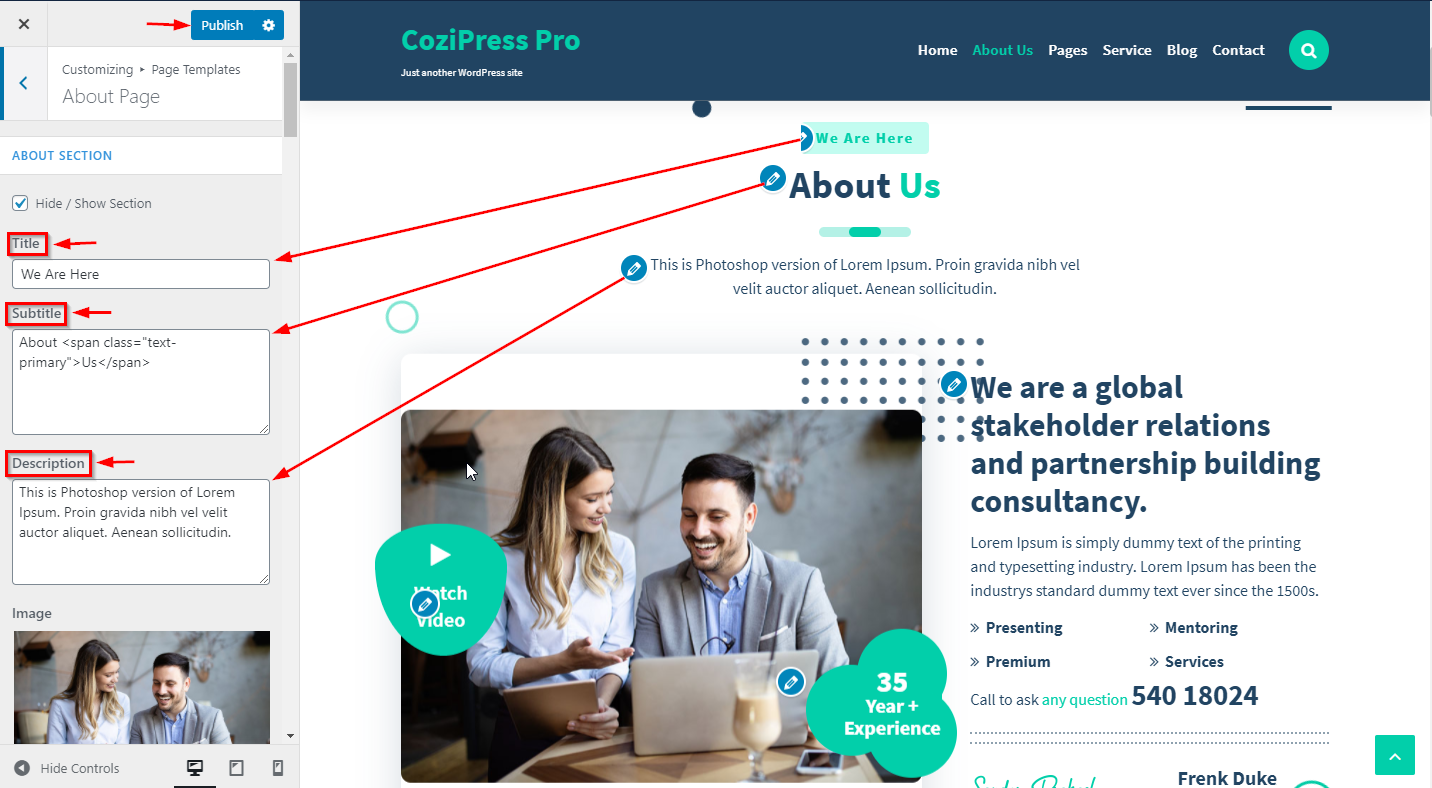
From your dashboard, go to the Appearance > Customize > Page Templates > About Page
Now click on check box for hide/show About section.
Click on Publish.

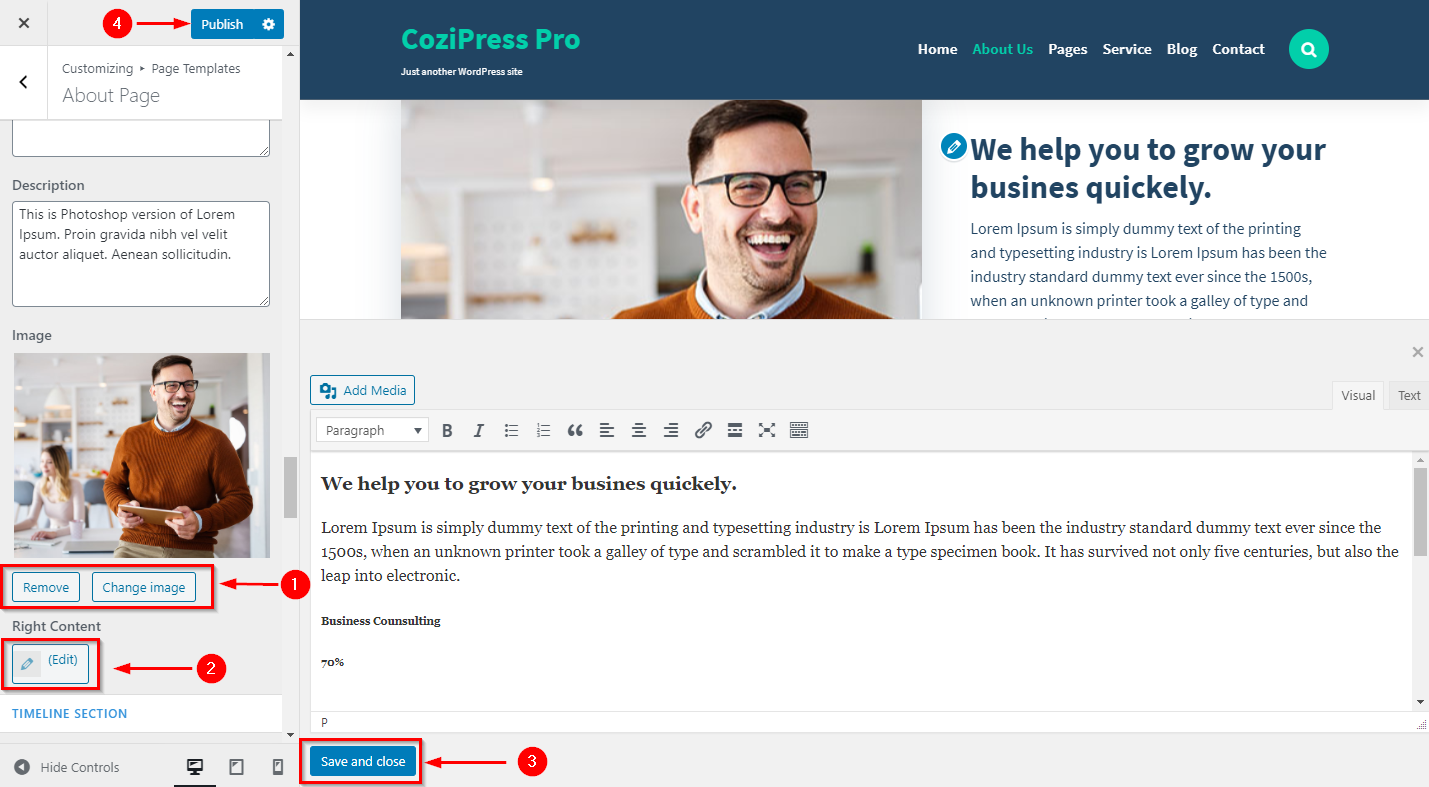
From your dashboard, go to the Appearance > Customize > Page Templates > About Page
Now you can manage title ,subtitle & Description.
Click on Publish.
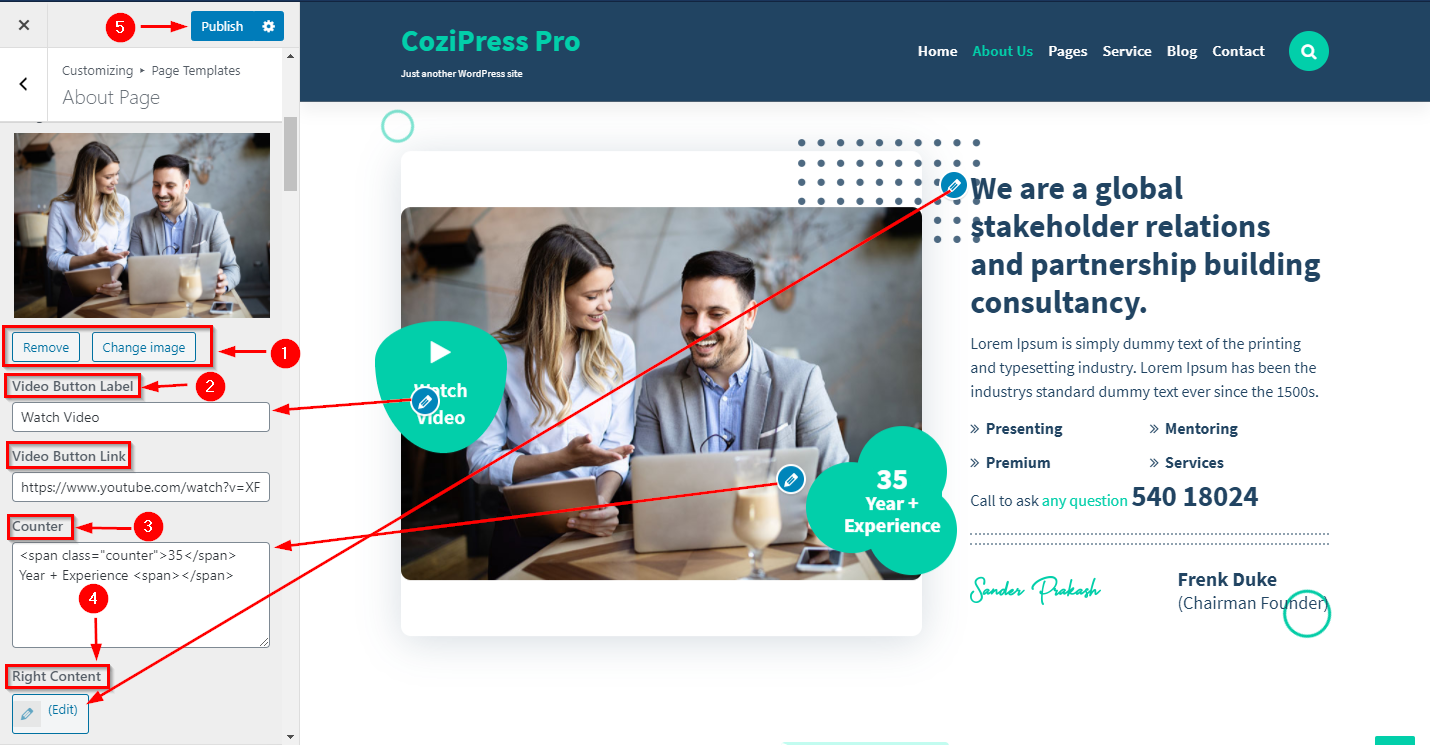
From your dashboard, go to the Appearance > Customize > Page Templates > About Page
Now you can manage video content.
From your dashboard, go to the Appearance > Customize > Page Templates > About Page
Now click on check box for hide/show Mission section.
Click on Publish.

From your dashboard, go to the Appearance > Customize > Page Templates > About Page
Now you can manage title ,subtitle & Description.
Click on Publish.
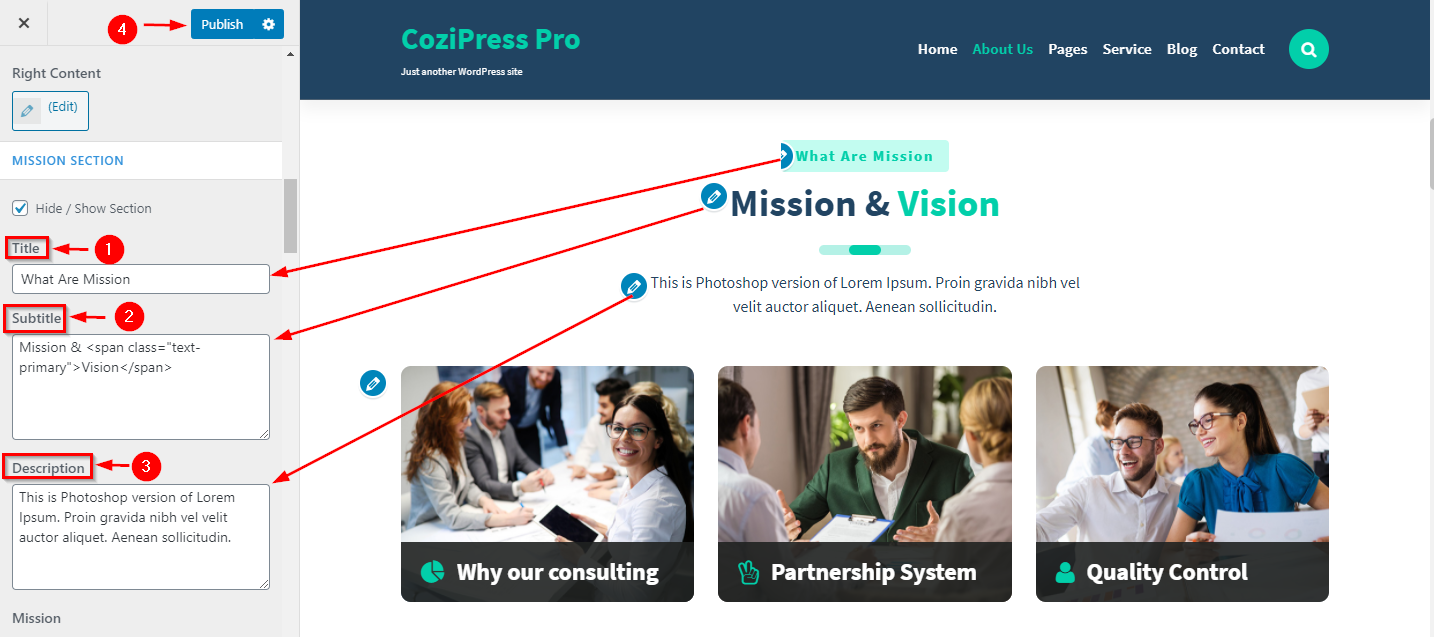
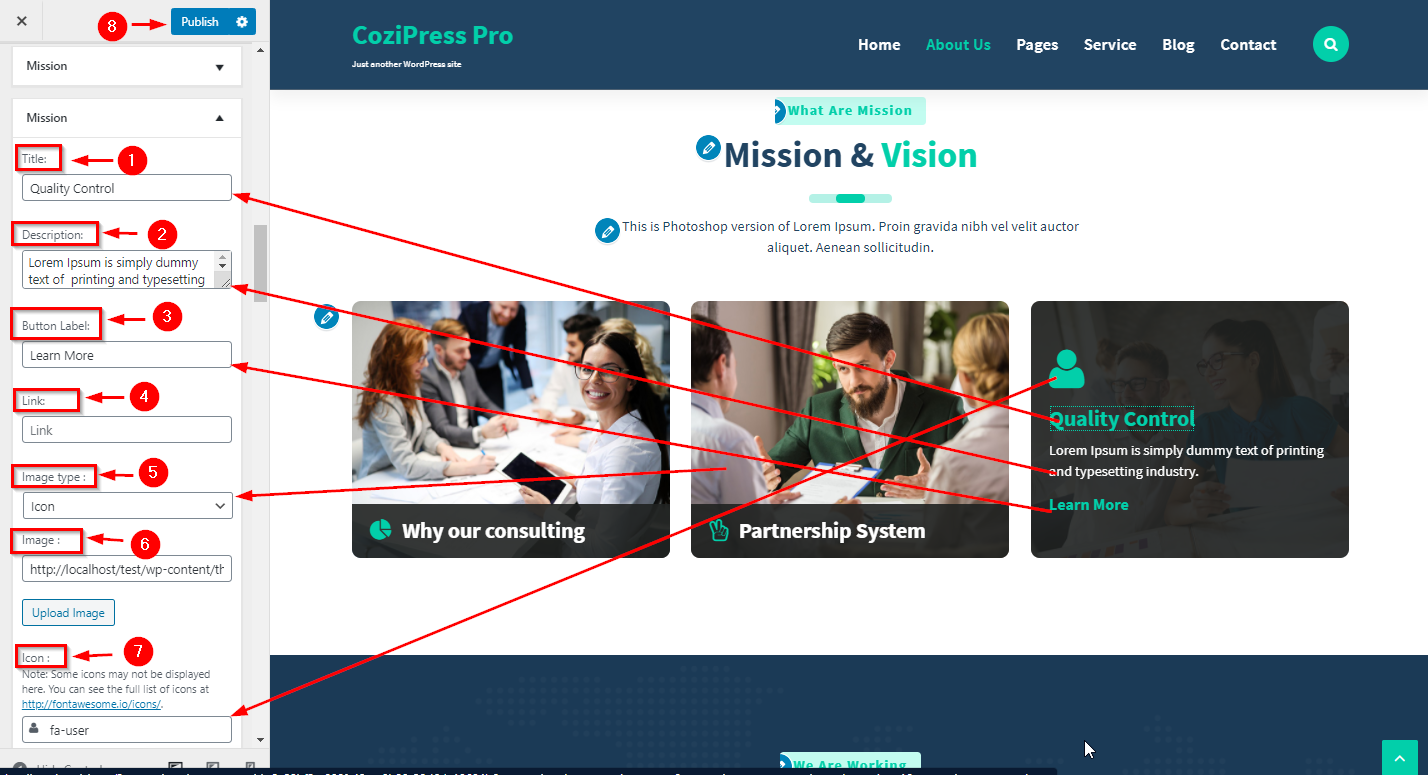
From your dashboard, go to the Appearance > Customize > Page Templates > About Page
Now you can manage content here of mission section.
Click on Publish.
From your dashboard, go to the Appearance > Customize > Page Templates > About Page
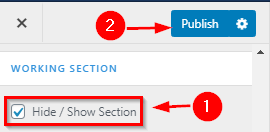
Now click on check box for hide/show working section.
Click on Publish.
From your dashboard, go to the Appearance > Customize > Page Templates > About Page
Now you can manage title ,subtitle & Description.
Click on Publish.
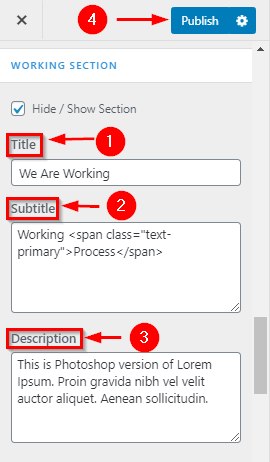
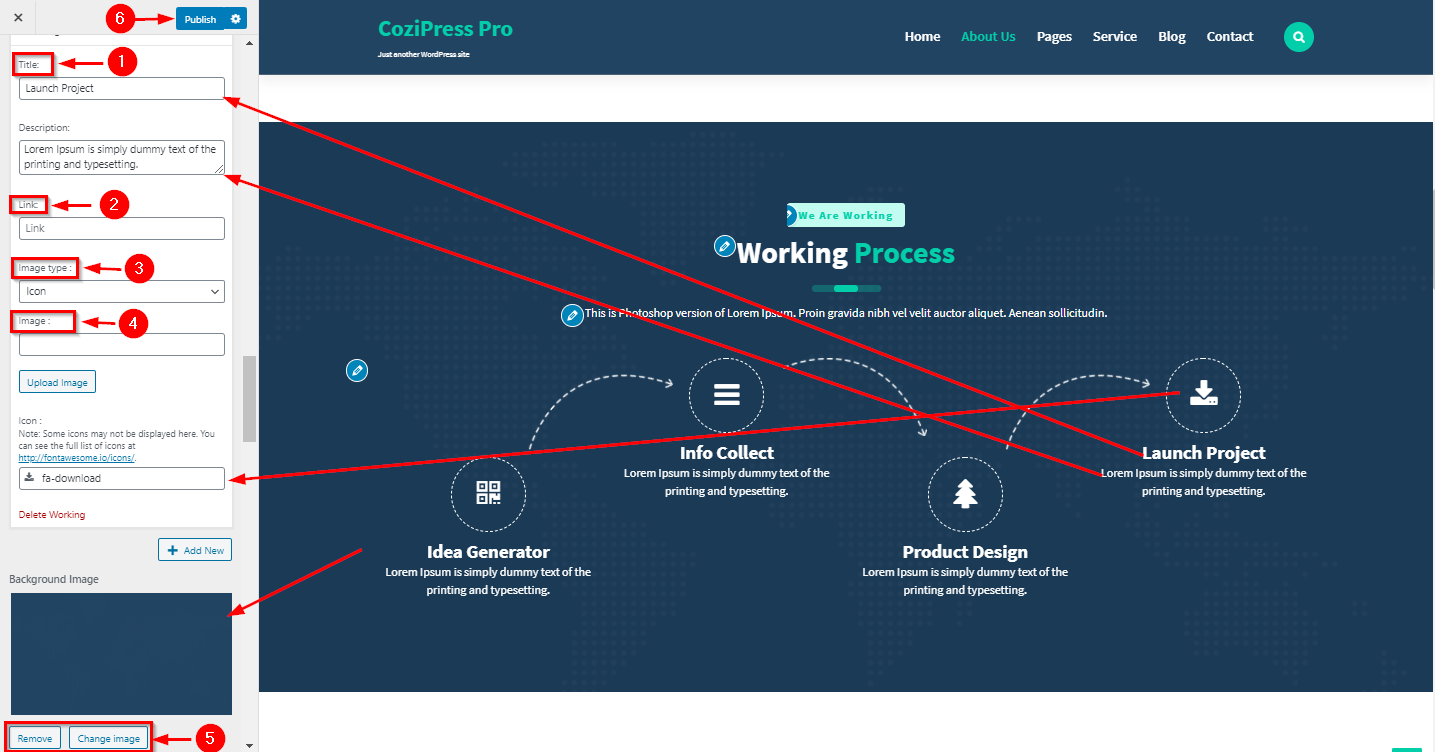
From your dashboard, go to the Appearance > Customize > Page Templates > About Page
Now you can manage content here of working section.
Click on Publish.
From your dashboard, go to the Appearance > Customize > Page Templates > About Page
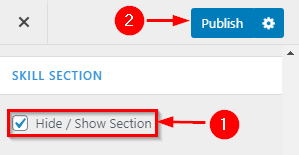
Now click on check box for hide/show Skill section.
Click on Publish.
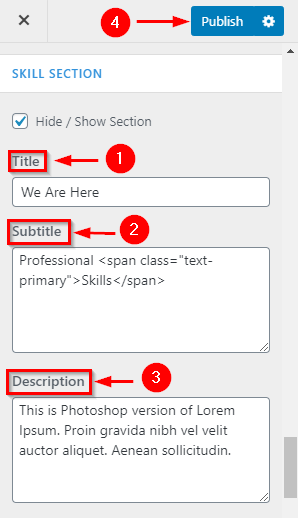
From your dashboard, go to the Appearance > Customize > Page Templates > About Page
Now you can manage title ,subtitle & Description.
Click on Publish.

From your dashboard, go to the Appearance > Customize > Page Templates > About Page
Now you can manage content here of skill section.
Click on Publish.
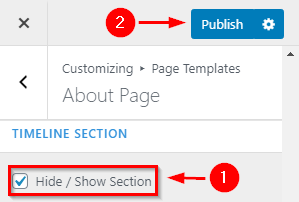
From your dashboard, go to the Appearance > Customize > Page Templates > About Page
Now click on check box for hide/show TimeLine section.
Click on Publish.
From your dashboard, go to the Appearance > Customize > Page Templates > About Page
Now you can manage title ,subtitle & Description.
Click on Publish.
From your dashboard, go to the Appearance > Customize > Page Templates > About Page
Now you can manage content here of Timeline section.
Click on Publish.

From your dashboard, go to the Appearance > Customize > Page Templates > About Page
Now click on check box for hide/show Funfact & Team section.
Click on Publish.
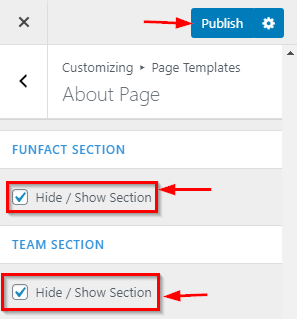
From your dashboard, go to the Appearance > Customize > Page Templates > About Page
Now you can manage content here of CTA section.
Click on Publish.

From your dashboard, go to the Appearance > Customize > Page Templates > About Page
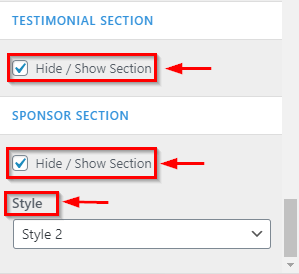
Now click on check box for hide/show Testimonial & Sponsor section.
Click on Publish.
From your dashboard , go to the Appearence > Additional CSS >
Here you can to paste your Additional Css
Click on Publish.

From your dashboard, go to the Appearance > Customize > FrontPage Sections > Sponsor Section
Here you can change title, Subtitle & Description in Sponsor section.
Click on Publish.

From your dashboard, go to the Appearance > Customize > FrontPage Sections > Sponsor Section
Here you setup content in sponsor section.
Click on Publish.

From your dashboard, go to the Appearance > Customize > FrontPage Sections > Sponsor Section
Here you can choose column layout in Sponsor section.
Click on Publish.
From your dashboard, go to the Appearance > Customize > FrontPage Sections > Sponsor Section
Here you can Select Sponsor Style.
Click on Publish.

From your dashboard , go to the Appearance > Customize > Background image
Here You can setup background image.
If you are change & remove logo then you can use buttons below it.
Click on Publish.

From your dashboard , go to the Appearance > Customize > Background image
Here You can setup preset background image.
Click on Publish.

From your dashboard , go to the Appearance > Customize > Background image
Here You can manage position & size background image.
Click on Publish.

From your dashboard , go to the Appearance > Customize > Background image
Here You can manage repeat background image & scroll with page background image.
Click on Publish.

From your dashboard, go to the Dashboard > Pages > Add New
Now Create a page & Select the Template.
Click on Publish.

From your dashboard, go to the Dashboard > Pages > Add New
Now Create a page & Select the Template.
Click on Publish.

From your dashboard, go to the Appearance > Customize > Page Templates > Pricing Page
Here you can change title, Subtitle & Description in Pricing section.
Click on Publish.

From your dashboard, go to the Appearance > Customize > Page Template > Pricing Page
Here you can display No. of pricing in Pricing section.
Click on Publish.

From your dashboard, go to the Appearance > Customize > Page Template > Pricing Page
Here you can choose column layout in pricing section.
Click on Publish.

From your dashboard, go to the Appearance > Customize > Section Reorder
Here you can manage section reorder.
Click on Publish.

From your dashboard, go to the Appearance > Customize > Page Templates > 404 page
Here you can change title, Subtitle SUbtite2 & Description in 404 page.
Click on Publish.

From your dashboard, go to the Appearance > Customize > Page Template > Gallery Page
Here you can change title, Subtitle & Description in Gallery section.
Click on Publish.
From your dashboard, go to the Appearance > Customize > Page Template > Gallery Page
Here you setup content in gallery section.
Click on Publish.

From your dashboard, go to the Appearance > Menus > Select Menu
Here Select Menu according to you
Click on Save Menu.

From your dashboard, go to the Dashboard > Pages > Add New
Now Create a page & Select the Template in Page Attributes.
Click on Publish.
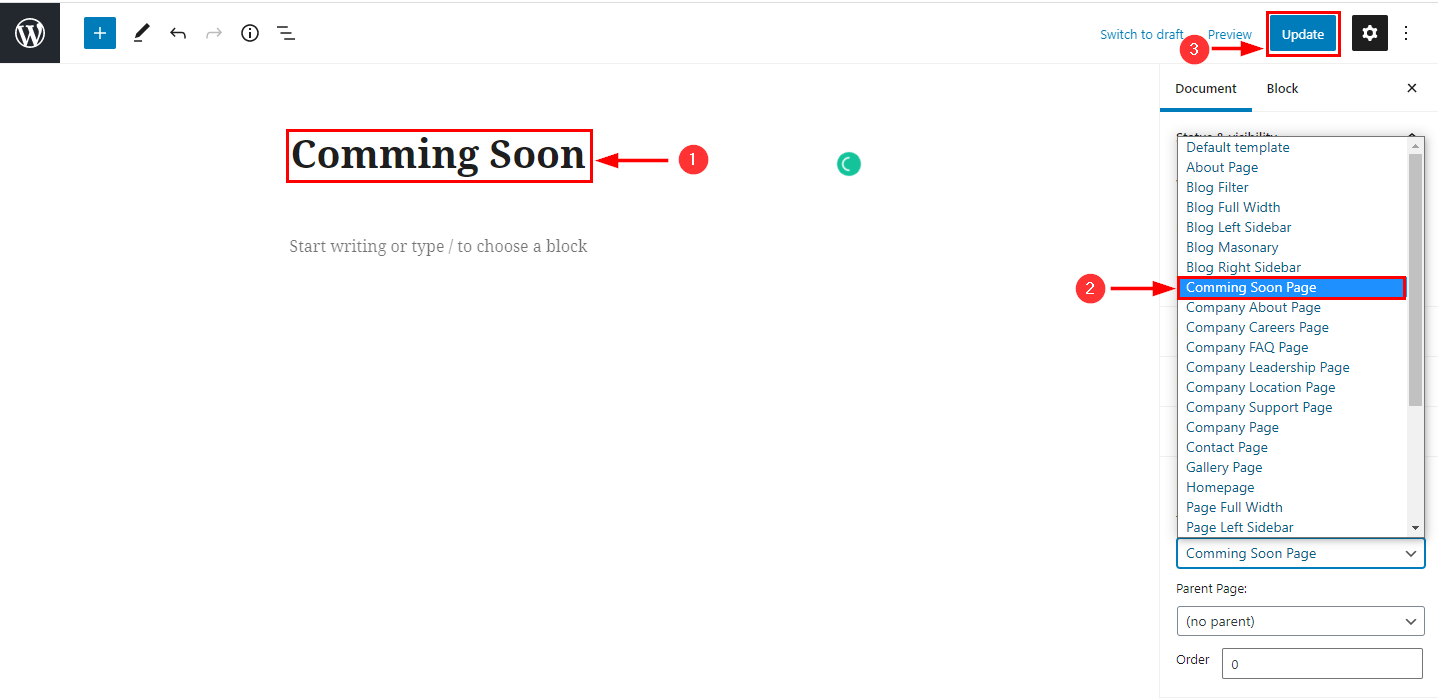
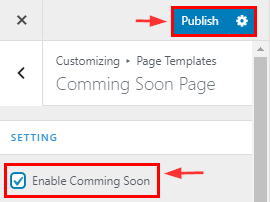
From your dashboard, go to the Appearance > Customize > Page Templates > Coming soon Page
Now click on check box for enable/disable coming soon page.
Click on Publish.
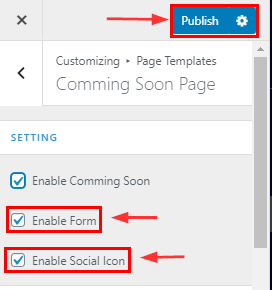
From your dashboard, go to the Appearance > Customize > Page Templates > Coming soon Page
Now click on check box for enable/disable form & social icons.
Click on Publish.
From your dashboard, go to the Appearance > Customize > Page Templates > Coming soon Page
Here You Can Manage time & Shortcode.
Click on Publish.

From your dashboard, go to the Appearance > Customize > Page Templates > Coming soon Page
Here You Can Manage time & Shortcode.
Click on Publish.

From your dashboard, go to the Appearance > Customize > FrontPage Sections > Funfact Section
Here you can manage content in Funfact section.
Click on Publish.

From your dashboard, go to the Appearance > Customize > FrontPage Sections > Funfact Section
Here you can choose column layout in funfact section.
Click on Publish.

From your dashboard, go to the Appearance > Customize > FrontPage Sections > Funfact Section
Here you can change & remove background image in funfact section.
Click on Publish.

From your dashboard, go to the Appearance > Customize > FrontPage Sections > Funfact Section
Here you can setup background image position in funfact section.
Click on Publish.

From your dashboard, go to the Dashboard > Pages > Add New
Now Create a page & Select the Template.
Click on Publish.

From your dashboard, go to the Dashboard > Page Template > FAQ Page
Now you can manage title,Subtitle & Description .
Click on Publish.

From your dashboard, go to the Dashboard > Page Template > FAQ Page
Now you can manage content of FAQ page.
Click on Publish.

From your dashboard, go to the Appearance > Customize > FrontPage Sections > Blog Section
Here you can change title, Subtitle & Description in Blog section.
Click on Publish.

From your dashboard, go to the Appearance > Customize > FrontPage Sections > Blog Section
Here you can manage no of posts display of Blog in FrontPage.
Click on Publish.

From your dashboard, go to the Appearance > Customize > FrontPage Sections > Blog Section
Here you can select category for blog section .
Click on Publish.

From your dashboard, go to the Appearance > Customize > FrontPage Sections > Blog Section
Here you can choose column layout in blog section.
Click on Publish.

From your dashboard, go to the Appearance > Customize > FrontPage Sections > Blog Section
Here you can change blog style in blog section.
Click on Publish.

From your dashboard , go to the Appearance > Customize > Colors > Header Text Color
Here You can manage header text color.
Click on Publish.

From your dashboard , go to the Appearance > Customize > Colors > Background Color
Here You can manage background color.
Click on Publish.

From your dashboard, go to the Dashboard > Pages > Add New
Now Create a page & Select the Template.
Click on Publish.
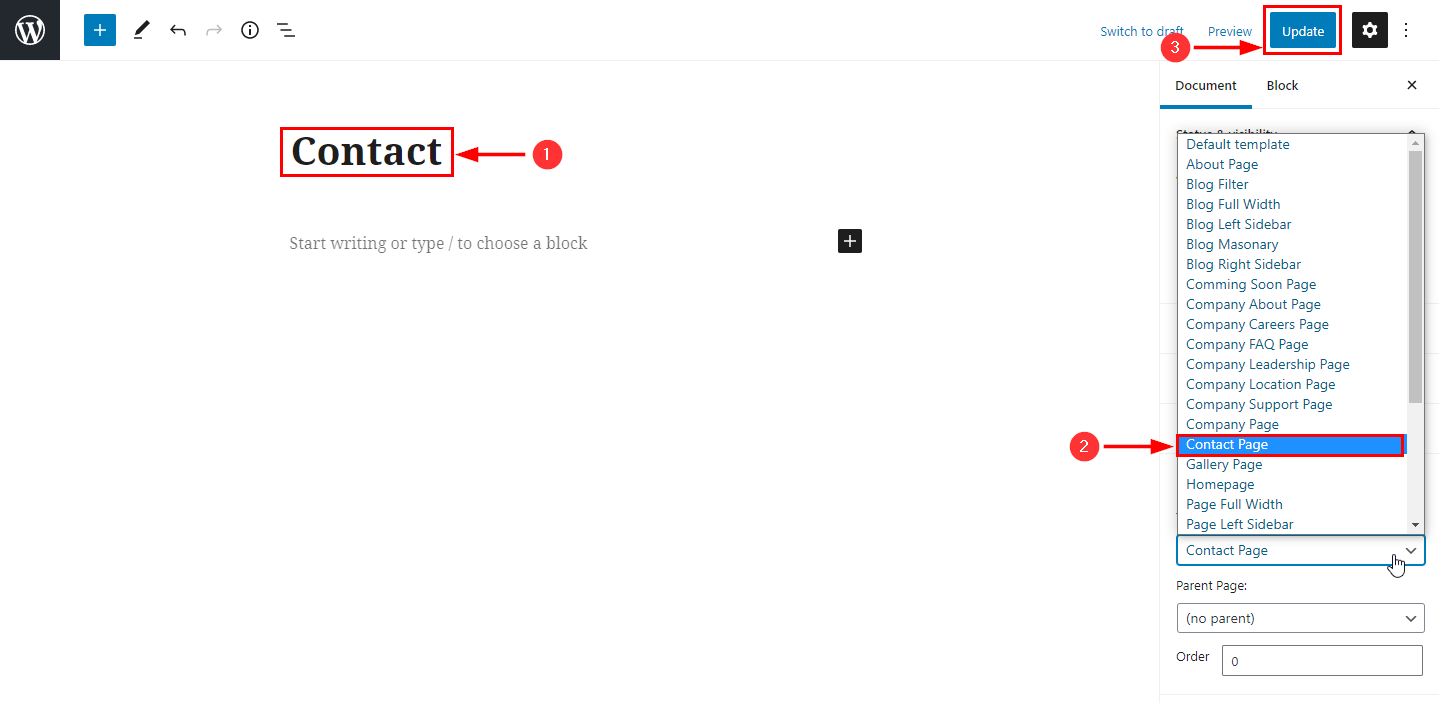
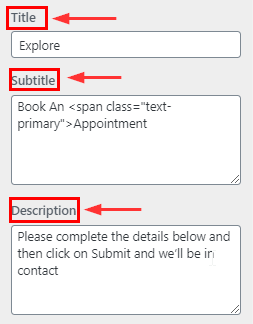
From your dashboard, go to the Appearance > Customize > Page Templates > Contact Page
Here you can change the title, Subtitle & Description in Contact Form Section.
Click on Publish.
From your dashboard, go to the Appearance > Customize > Page Templates > Contact Page
Here you can change the Address Content in Contact Form Section.
Click on Publish.

From your dashboard, go to the Appearance > Customize > Page Templates > Contact Page
Here you can use shortcode for form.
Click on Publish.

From your dashboard, go to the Appearance > Customize > Page Templates > Contact Page
Here you can change the content in contact info section.
Click on Publish.

From your dashboard, go to the Appearance > Customize > Page Templates > Contact Page
Here you can change background image related setting in contact info section.
Click on Publish.

From your dashboard, go to the Appearance > Customize > Page Templates > Contact Page
Here you can change map related setting in contact info section.
Click on Publish.

Go to Pages > Add New > Create a Page Named Home ( the name could be anything you like).
At the Right Side Under the Template drop-down Menu is for Choosing the Home Page.
You have to Choose the Template and publish it.
From your dashboard , go to the Setting > Reading > Home Page Displays
Click on radio button of your A Static page
Click on Save Changes.

From your dashboard, go to the Dashboard > Pages > Add New
Now Create a page & Select the Template.
Click on Publish.
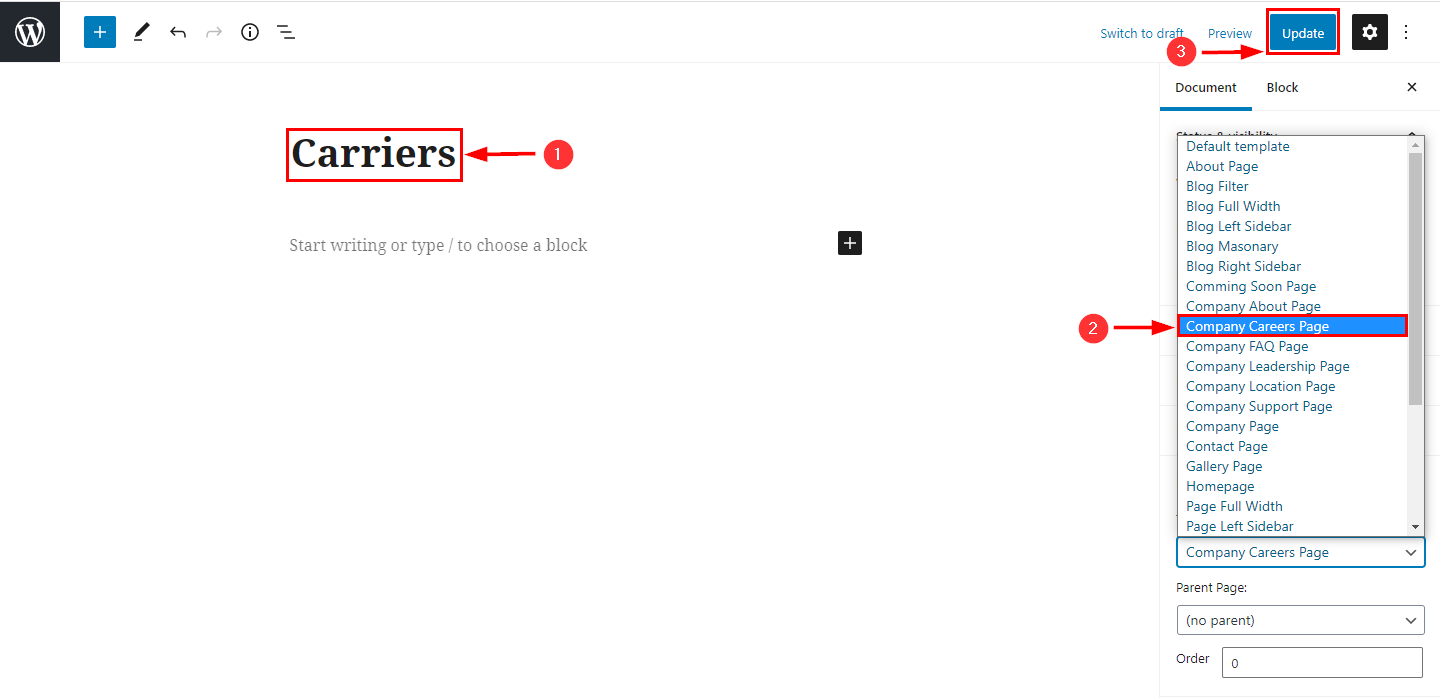
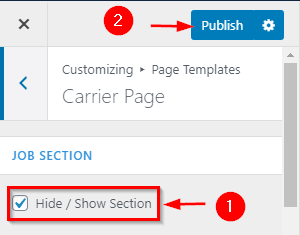
From your dashboard, go to the Appearance > Customize > Page Templates > Company Careers Page
Now click on the check box for the hide/show company careers section.
Click on Publish.
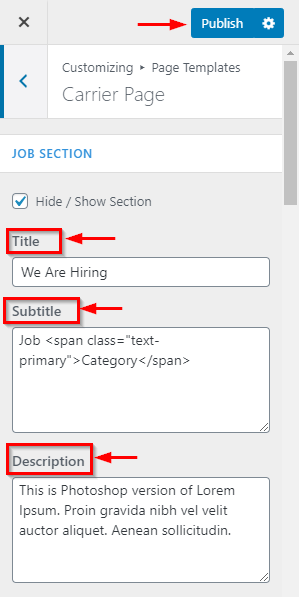
From your dashboard, go to the Appearance > Customize > Page Templates > Company Careers Page
Now click on here manage title, Subtitle & Description.
Click on Publish.
From your dashboard, go to the Appearance & Customize > Page Templates > Company Careers Page
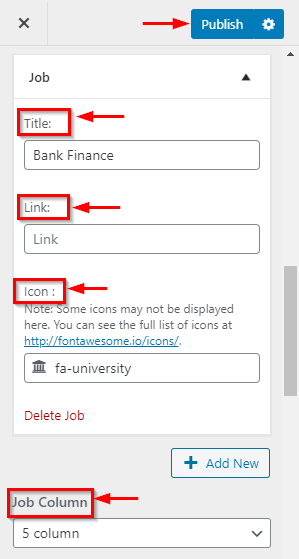
Now click on here manage content of job section.
Click on Publish.
From your dashboard, go to the Appearance > Customize > Page Templates > Company Careers Page
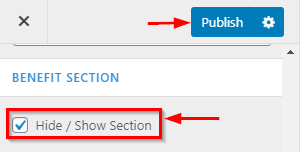
Now click on the check box for the hide/show company benefit section.
Click on Publish.
From your dashboard, go to the Appearance > Customize > Page Templates > Company Careers Page
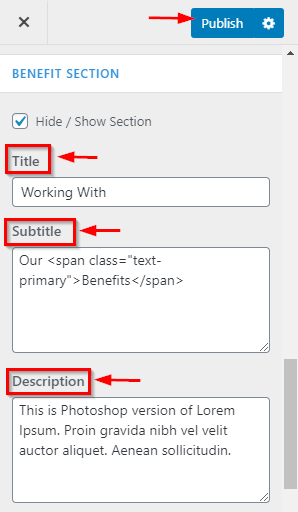
Now click on here manage title, Subtitle & Description.
Click on Publish.
From your dashboard, go to the Appearance > Customize > Page Templates > Company Careers Page
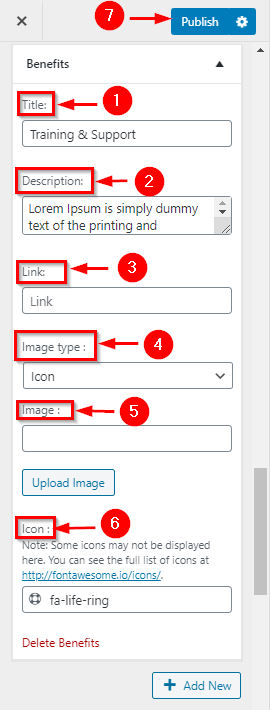
Now click on here manage content of benefit section.
Click on Publish.
From your dashboard, go to the Appearance > Customize > Page Templates > Company Careers Page
Now click on the check box for the hide/show opening job section.
Click on Publish.

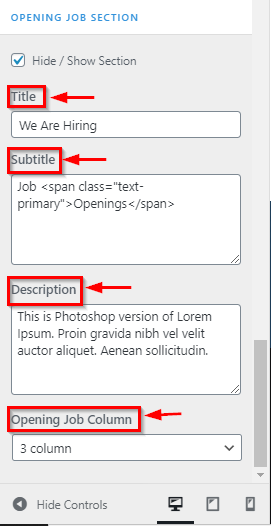
From your dashboard, go to the Appearance > Customize > Page Templates > Company Careers Page
Now click on here manage content of opening job section.
Click on Publish.
From your dashboard, go to the Appearance > Customize > Footer > Footer Above
Here you can change footer background image related setting.
Click on Publish.

From your dashboard, go to the Appearance > Customize > Footer > Footer Above
Here you can manage footer widget layout.
Click on Publish.

From your dashboard, go to the Appearance > Customize > Footer > Footer Above
Here you can manage footer bottom .
Click on Publish.

From your dashboard, go to the Appearance > Customize > FrontPage Sections > Custom Section
Here you can change title, Subtitle & Description in Custom section.
Click on Publish.

From your dashboard, go to the Appearance > Customize > FrontPage Sections > Custom Section
Here you can change in Custom section.
Click on Publish.

From your dashboard, go to the Appearance > project > add new project
Here you can create new project.
Click on Publish.

From your dashboard, go to the Appearance > post > add a new post
Here you can create a new blog post.
Click on Publish.

From your dashboard, go to the Appearance > job > add new job
Here you can create new job.
Click on Publish.
