

How to Manage StoreX Options in Storex Pro?
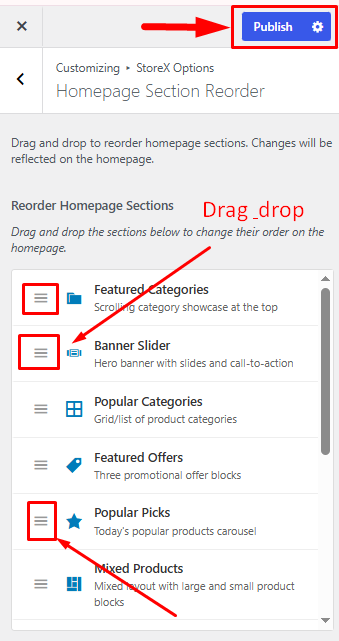
1. How to Manage Homepage Section Reorder.
From your dashboard, go to the Appearance > Customize > StoreX Options > Homepage Section Reorder
Here you can easily Drag & Drop Sections.
Publish Now
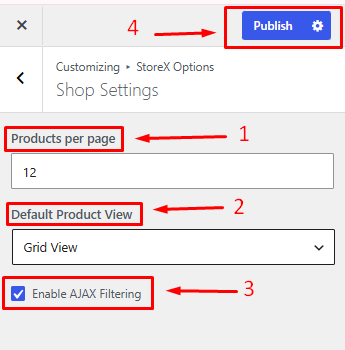
2. How to Manage Shop Settings.
From your dashboard, go to the Appearance > Customize > StoreX Options > Shop Settings
Products Per Page: Specify the number of products displayed on each shop page.
Default Product View: Choose the default layout for displaying products (e.g., Grid or List view).
Enable AJAX Filtering: Enable or disable AJAX-based product filtering without page reloads.
Publish Now
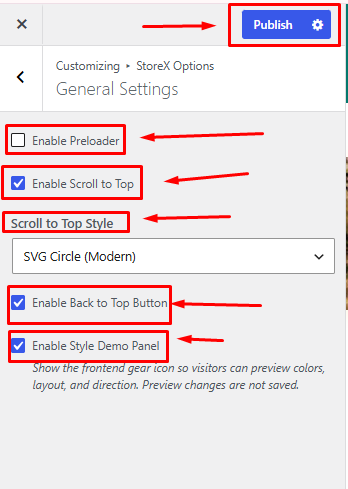
3. How to Manage General Settings.
From your dashboard, go to the Appearance > Customize > StoreX Options >General Settings
Enable Preloader: Show or hide the website preloader during page loading.
Enable Scroll to Top: Enable or disable the scroll-to-top functionality.
Scroll to Top Style: Choose the design style for the scroll-to-top button.
Enable Back to Top Button: Display or hide the back-to-top button on the website.
Enable Style Demo Panel: Enable or disable the style demo panel for theme customization preview.
Publish Now
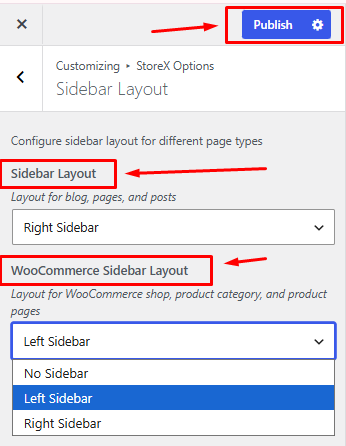
4. How to Manage Sidebar Layout.
From your dashboard, go to the Appearance > Customize > StoreX Options >Sidebar Layout
Sidebar Layout: Choose the default sidebar position for pages (e.g., Left Sidebar, Right Sidebar, or No Sidebar).
WooCommerce Sidebar Layout: Select the sidebar layout for WooCommerce shop, category, and product pages.
Publish Now
5. How to Manage Breadcrumb Settings.
From your dashboard, go to the Appearance > Customize > StoreX Options > Breadcrumb Settings.
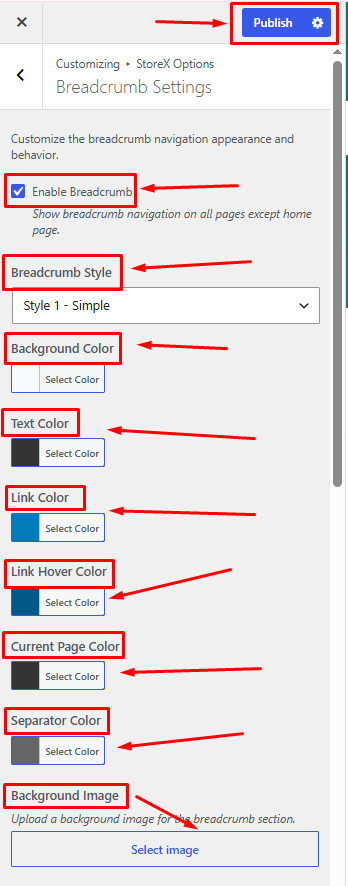
Enable Breadcrumb: Show or hide the breadcrumb navigation.
Breadcrumb Style: Select the breadcrumb display style.
Background Color: Set the breadcrumb background color.
Text Color: Choose the text color.
Link Color: Set the breadcrumb link color.
Link Hover Color: Choose the link hover color.
Current Page Color: Set the color of the current page title.
Separator Color: Choose the separator color.
Background Image: Upload a background image for the breadcrumb area.
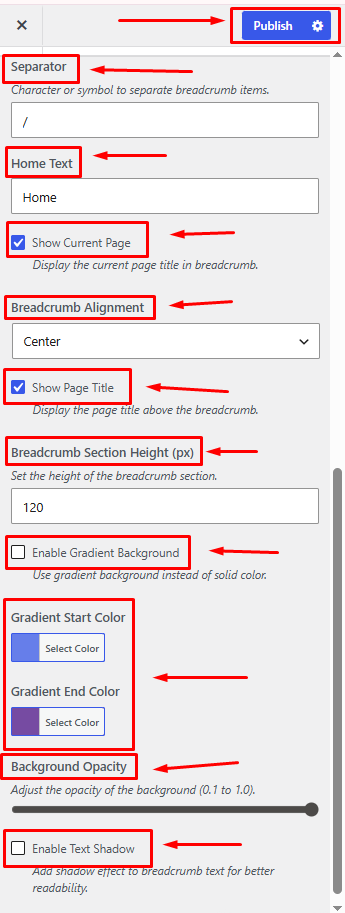
Separator: Enter the breadcrumb separator symbol.
Home Text: Set the text displayed for the home link.
Show Current Page: Display or hide the current page name.
Breadcrumb Alignment: Choose the breadcrumb alignment.
Show Page Title: Display or hide the page title.
Breadcrumb Section Height (px): Set the height of the breadcrumb section.
Enable Gradient Background: Enable or disable a gradient background.
Gradient Start Color: Select the starting color of the gradient.
Gradient End Color: Select the ending color of the gradient.
Background Opacity: Adjust the background transparency level.
Enable Text Shadow: Show or hide text shadow effects.
Publish Now
Breadcrumb image One:-
Breadcrumb image Two:-
6. How to Manage WooCommerce Settings.
From your dashboard, go to the Appearance > Customize > StoreX Options > WooCommerce Settings.
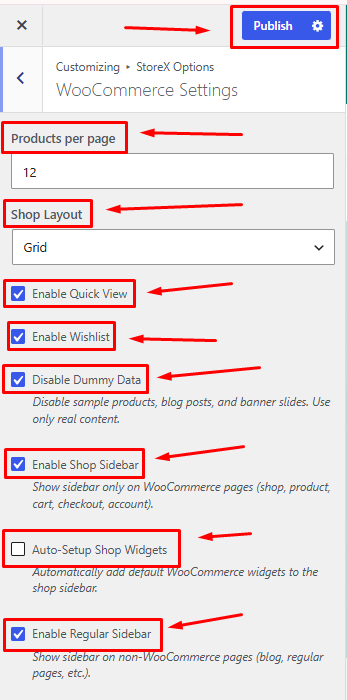
Products per Page: Set the number of products displayed per shop page.
Shop Layout: Choose how products are displayed (Grid or List).
Enable Quick View: Allow customers to preview products in a pop-up.
Enable Wishlist: Allow customers to save products to a wishlist.
Disable Dummy Data: Hide demo content and display only real store data.
Enable Shop Sidebar: Show the sidebar on WooCommerce pages.
Auto-Setup Shop Widgets: Automatically add default WooCommerce widgets to the shop sidebar.
Enable Regular Sidebar: Show the sidebar on blog and other non-shop pages.
Publish Settings: Click Publish to save and apply changes.
7. How to Manage Blog Settings.
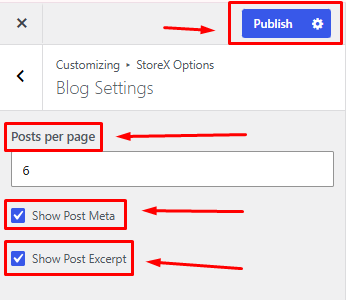
From your dashboard, go to the Appearance > Customize > StoreX Options > Blog Settings.
Posts per page: Set the number of Posts displayed per Blog page.
How to Hide/Show Post Meta
How to Hide/Show Post Excerpt
Publish Settings: Click Publish to save and apply changes.
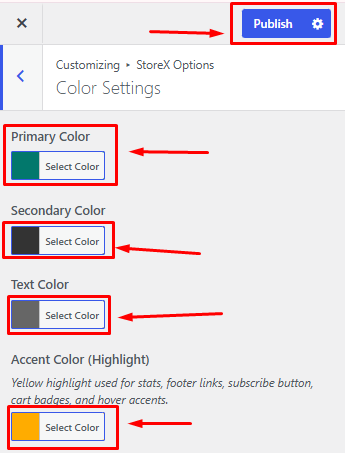
8. How to Manage Color Settings.
From your dashboard, go to the Appearance > Customize > StoreX Options >Color Settings
Primary Color: Select the main color used throughout your website.
Secondary Color: Choose a secondary color to complement the primary color.
Text Color: Set the default color for website text content.
Accent Color (Highlight): Choose a highlight color for buttons, badges, links, and other important elements.
Publish Settings: Click Publish to save and apply all color changes.
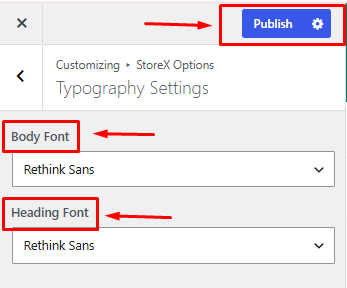
9. How to Manage Typography Settings.
From your dashboard, go to the Appearance > Customize > StoreX Options >Typography Settings.
Select Body Font & Heading Font
Publish
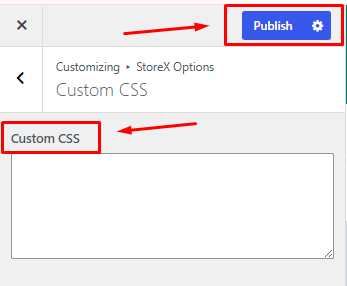
10. How to Manage Custom CSS.
From your dashboard, go to the Appearance > Customize > StoreX Options > Custom CSS
Here, add Custom CSS
Publish Now
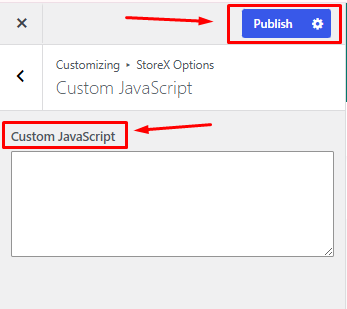
11. How to Manage Custom JavaScript.
From your dashboard, go to the Appearance > Customize > StoreX Options > Custom JavaScript
Here, add Custom JavaScript
Publish Now
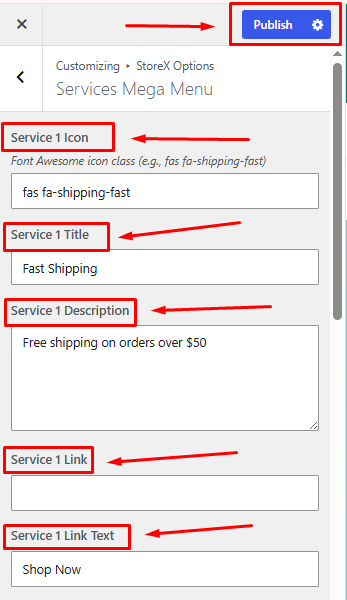
12. How to Manage Services Mega Menu.
From your dashboard, go to the Appearance > Customize > StoreX Options > Services Mega Menu
Service 1 Icon: Enter a Font Awesome icon class for the service.
Service 1 Title: Enter the service title.
Service 1 Description: Add a short description of the service.
Service 1 Link: Enter the URL for the service button or page.
Service 1 Link Text: Enter the text displayed for the service link button.
Additional Services: Scroll down to configure the remaining service items using the same settings for each service block.
Publish Settings: Click Publish to save and apply all changes.
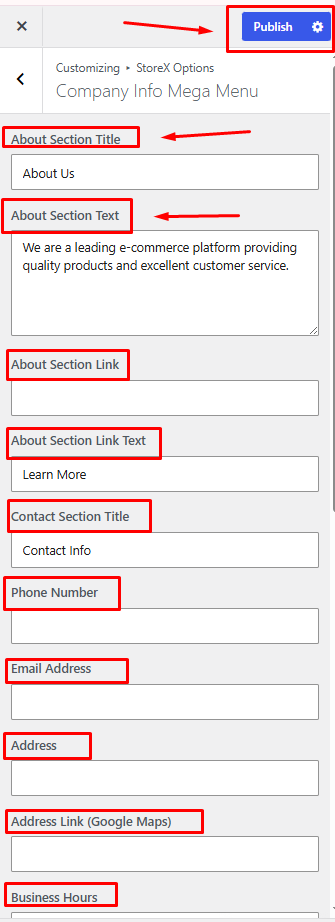
12. How to Manage Company Info Mega Menu.
From your dashboard, go to the Appearance > Customize > StoreX Options > Company Info Mega Menu.
About Section Title: Enter the heading for the company information section.
About Section Text: Add a short description about your company or business.
About Section Link: Enter the URL for the About section button or page.
About Section Link Text: Enter the text displayed for the About section link.
Contact Section Title: Enter the heading for the contact information section.
Phone Number: Add your business contact number.
Email Address: Enter your business email address.
Address: Add your business or office address.
Address Link (Google Maps): Enter the Google Maps URL for your location.
Business Hours: Add your business working hours.
Note: Scroll down to configure additional company information and contact details available in this section.
Publish Settings: Click Publish to save and apply all changes.
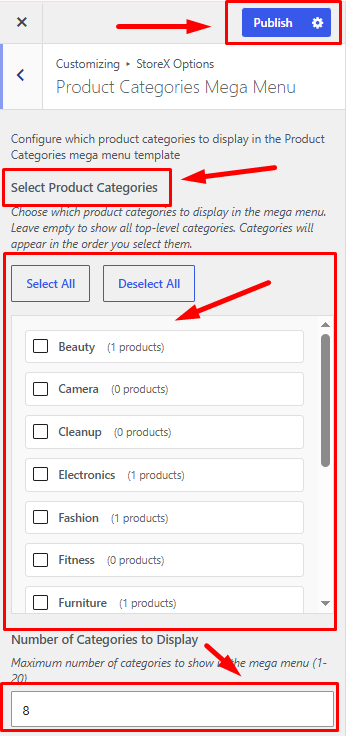
13. How to Manage Product Categories, Mega Menu.
From your dashboard, go to the Appearance > Customize > StoreX Options > Product Categories Mega Menu.
Select Product Categories: Choose the product categories to display in the mega menu.
Number of Categories to Display: Set how many categories should be shown in the mega menu.
Publish Settings: Click Publish to save and apply all changes.
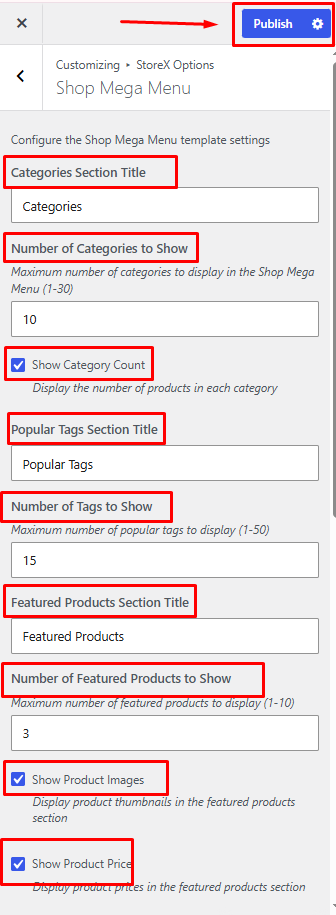
14. How to Manage Shop Mega Menu.
From your dashboard, go to the Appearance > Customize > StoreX Options >Shop Mega Menu.
Categories Section Title: Enter the heading for the product categories section.
Number of Categories to Show: Set the maximum number of categories displayed in the mega menu.
Show Category Count: Enable to display the number of products available in each category.
Popular Tags Section Title: Enter the heading for the popular tags section.
Number of Tags to Show: Set the maximum number of popular tags displayed.
Featured Products Section Title: Enter the heading for the featured products section.
Number of Featured Products to Show: Set the maximum number of featured products displayed.
Show Product Images: Enable the display of product thumbnails in the featured products section.
Show Product Prices: Enable the display of product prices for featured products.
Note: Scroll down to configure additional shop mega menu settings and display options.
Publish Settings: Click Publish to save and apply all changes.
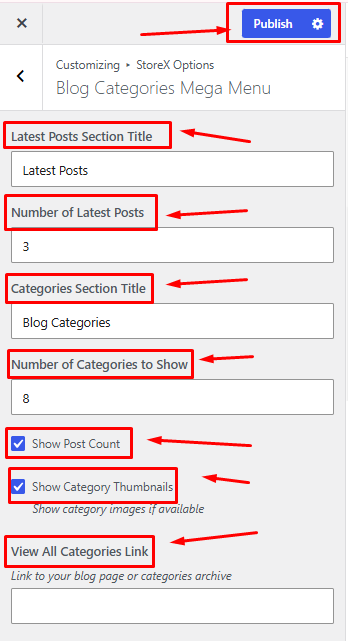
15. How to Manage Blog Categories, Mega Menu.
From your dashboard, go to the Appearance > Customize > StoreX Options >Blog Categories Mega Menu.
Latest Posts Section Title: Enter the heading for the latest posts section.
Number of Latest Posts: Set the number of recent blog posts to display.
Categories Section Title: Enter the heading for the blog categories section.
Number of Categories to Show: Set the maximum number of categories displayed.
Show Post Count: Enable to display the number of posts in each category.
Show Category Thumbnails: Enable to display category thumbnail images.
View All Categories Link: Enter the URL for the "View All Categories" page.
Publish Settings: Click Publish to save and apply all changes.
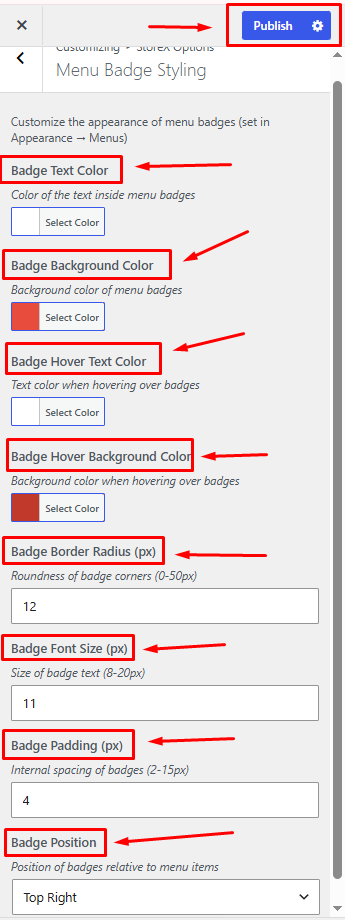
16. How to Manage Menu Badge Styling.
From your dashboard, go to the Appearance > Customize > StoreX Options > Menu Badge Styling
Badge Text Color: Choose the text color for menu badges.
Badge Background Color: Select the background color for menu badges.
Badge Hover Text Color: Set the text color displayed when hovering over a badge.
Badge Hover Background Color: Select the background color displayed when hovering over a badge.
Badge Border Radius (px): Adjust the roundness of badge corners.
Badge Font Size (px): Set the font size of the badge text.
Badge Padding (px): Control the spacing inside the badge.
Badge Position: Choose where the badge appears relative to the menu item.
Publish Settings: Click Publish to save and apply all changes.
.
.