How to Manage Page Templates in Storex Pro?
1. How to Manage 404 Page Settings on the Page Template.
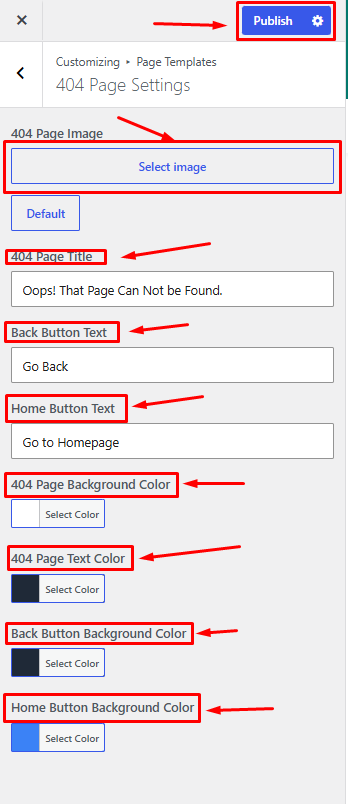
From your dashboard, go to the Appearance > Customize > Page Templates > 404 Page Settings
404 Page Image: Upload or select an image to display on the 404 error page.
404 Page Title: Enter the heading displayed on the 404 page.
Back Button Text: Set the text for the back navigation button.
Home Button Text: Set the text for the button that redirects users to the homepage.
404 Page Background Color: Choose the background color of the 404 page.
404 Page Text Color: Select the color used for the page title and text.
Back Button Background Color: Set the background color of the back button.
Home Button Background Color: Choose the background color of the home button.
Publish Changes: Save and apply your settings.
2. How to Manage Blog Details Page Settings on the Page Template.
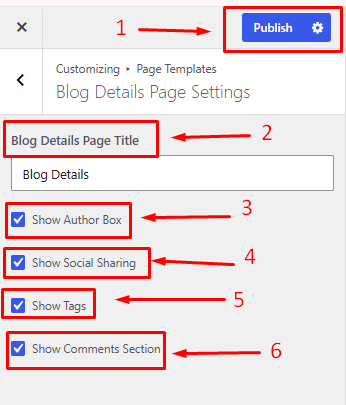
From your dashboard, go to the Appearance > Customize > Page Templates > Blog Details Page Settings
Blog Details Page Title: Enter the title displayed on the blog details page.
Show Author Box: Enable or disable the author information section below blog posts.
Show Social Sharing: Display or hide social media sharing buttons on blog posts.
Show Comments Section: Enable or disable the comments section for blog posts.
Publish Changes: Save and apply your settings.
3. How to Manage Blog Grid Page Settings on the Page Template.
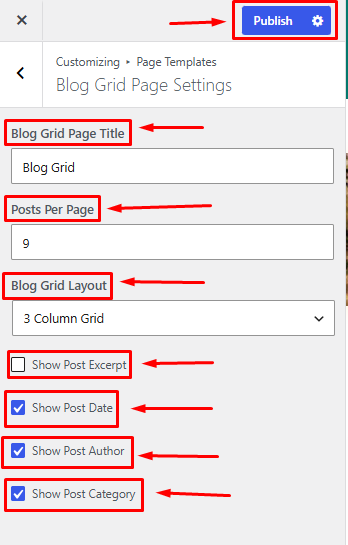
From your dashboard, go to the Appearance > Customize > Page Templates > Blog Grid Page Settings
Blog Grid Page Title: Enter the heading displayed on the blog listing page.
Posts Per Page: Specify the number of blog posts displayed per page.
Blog Grid Layout: Choose the layout style for displaying blog posts.
Show Post Excerpt: Enable or disable post excerpts in the blog grid.
Show Post Date: Display or hide the publication date for blog posts.
Show Post Author: Display or hide the author name for blog posts.
Show Post Category: Display or hide the category name for blog posts.
Publish Changes: Save and apply your settings.