How to Manage Header Settings in Storex Pro?
1. How to change the Site logo
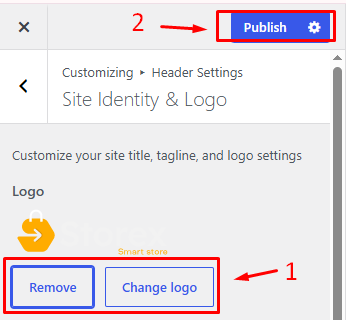
From your dashboard, go to the Appearance > Customize > Header Settings > Site Identity & Logo Section
Now, click Select Logo and choose a logo for your site.
If you change & remove the logo, then you can use the buttons below it.
Click on Publish.
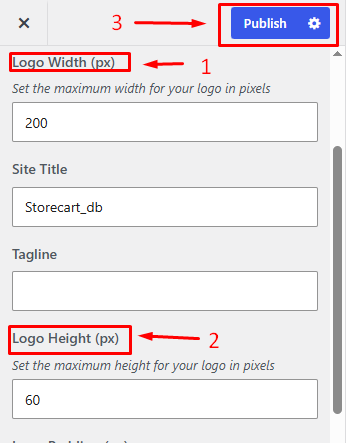
2. How to customize the width & Height of the logo
From your dashboard, go to the Appearance > Customize > Header Settings > Site Identity & Logo Section
Now, set the maximum width & Height for your logo in pixels
Click on Publish.
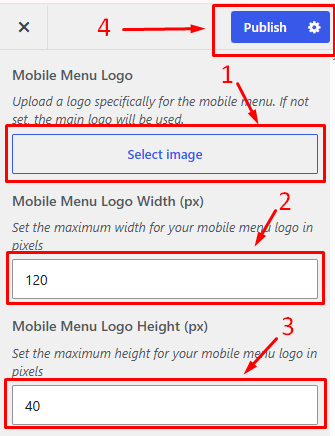
3. How to Customize the Mobile Menu logo Width
From your dashboard, go to the Appearance > Customize > Header Settings > Site Identity & Logo Section
Now, set the maximum width & Height for your Mobile logo in pixels
Click on Publish.
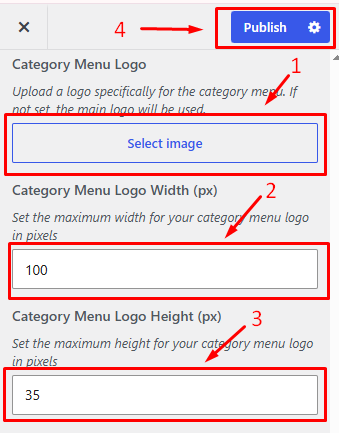
4. How to Customize the Category Menu logo
From your dashboard, go to the Appearance > Customize > Header Settings > Site Identity & Logo Section
Now, set the maximum width & Height for your Mobile logo in pixels
Click on Publish.
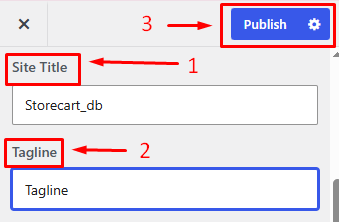
5. How to manage Site Title & Tagline
From your dashboard, go to the Appearance > Customize > Header Settings > Site Identity Logo Section.
Now, manage the site title & tagline as per your choice.
Click on Publish.
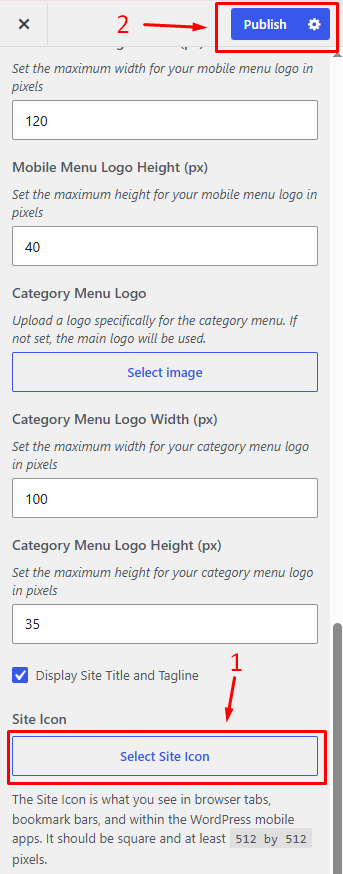
6. How to change the site icon
From your dashboard, go to the Appearance > Customize > Header Settings > Site Identity Section
Now, click on the button & select the Site icon.
You can use the site icon size of a maximum of 512 x 512px.
Click on Publish.
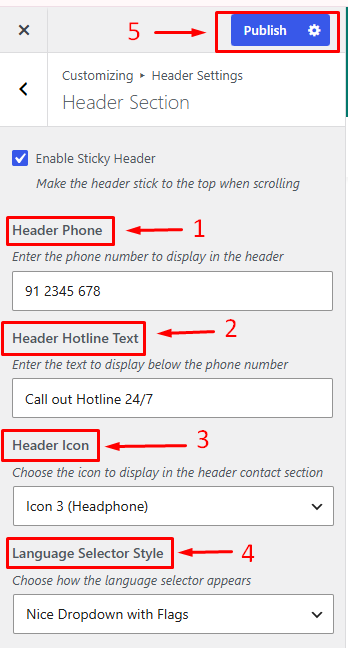
7. How to manage info in the Header Section
From your dashboard, go to the Appearance > Customize > Header Settings > Header Section
Here you can manage the Header Phone & Header Hotline Text as per your choice.
Also, here you can manage the Header Icon & Language Selector Style according to your choice.
Click on Publish.