

How to manage header section in Spintech
1. How to change the Site logo
From your dashboard , go to the Appearance > Customize > Header > Site Identity Section
Now Click on select logo and choose logo for your site .
If you are change & remove logo then you can use buttons below it.
Click on Publish

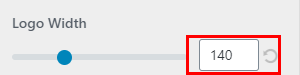
2. How to customize width of Site logo
From your dashboard , go to the Appearance > Customize > Header > Site Identity Section
Now Scroll bar use for logo width Customize.
Click on Publish.
3. How to manage Site Title & Tagline
From your dashboard , go to the Appearance > Customize > Header > Site Identity Section
Now manage site title & tagline as per your choice .
Click on Publish.

4.How to display Site Title & Tagline
From your dashboard , go to the Appearance > Customize > Header > Site Identity Section
Now Click on Check box for Hide/Show Site title & tagline.
Click on Publish.

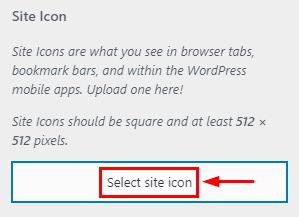
5.How to change the site icon
From your dashboard , go to the Appearance > Customize > Header > Site Identity Section
Now Click on button & select Site icon .
You can use site icon size maximum 512 x 512px.
Click on Publish.
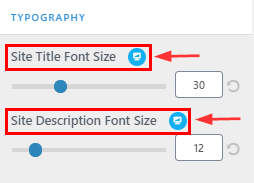
6.How to Customize Site title & description font size Pro Features
From your dashboard , go to the Appearance > Customize > Header > Site Identity Section
Here you can customize Site title & description .
Click on Publish.
7.How to Change header type Pro Features
From your dashboard , go to the Appearance > Customize > Header > Header Style Section
Here you can select header type according to you .
Click on Publish.

8.Hide/Show Hirring Section
From your dashboard, go to the Appearance > Customize > Header > Above header Section
Check Box on the Hide/Show above Header option to reveal the header top bar options.
Click on Publish.

9.How to manage title & content in Hirring Section
From your dashboard, go to the Appearance > Customize > Header > Above header Section
Here you can change title & content as per your choice.
Click on Publish.

10.Hide /Show Contact info section
From your dashboard, go to the Appearance > Customize > Header > Above header Section
Check Box on the Hide/Show above Header option to reveal the header top bar options.
Click on Publish.

11.How to manage icon & text in contact info section
From your dashboard, go to the Appearance > Customize > Header > Above header Section
Now you can select icon in icons library & manage text in contact info section.
Click on Publish.

12.Hide/Show Social icon section
From your dashboard, go to the Appearance > Customize > Header > Above header Section
Check Box on the Hide/Show above Header option to reveal the header top bar options.
Click on Publish.

13.How to Manage Social icons
From your dashboard, go to the Appearance > Customize > Header > Above header Section
Now you can select icon in social icons library.
Click on Publish.

14.Hide/Show Cart icon in Header Navigation Pro Features
From your dashboard, go to the Appearance > Customize > Header > Header Navigation Section
Now Click on check box for Hide/Show Cart icon.
Click on Publish.

15.Hide/Show Search icon in Header Navigation
From your dashboard, go to the Appearance > Customize > Header > Header Navigation Section
Now Click on check box for Hide/Show Search icon.
Click on Publish.

16.Hide / Show Contact in Header Navigation
From your dashboard, go to the Appearance > Customize > Header > Header Navigation Section
Now Click on check box for Hide/Show Contact.
Click on Publish.

17.How to manage icon in contact Header Navigation
From your dashboard, go to the Appearance > Customize > Header > Header Navigation Section
Here you can choose icon for contact.
Now Click on publish.

18.How to manage title & text in contact Header navigation
From your dashboard, go to the Appearance > Customize > Header > Header Navigation Section
Here you can manage title & text according to you.
Now Click on publish.

19.Hide/Show Sticky Header
From your dashboard, go to the Appearance > Customize > Header > Sticky Header Section
Now Click on check box for Hide/Show Sticky header
Click on Publish.
